Using Payment Links, Payment Page, payment extensions, Payouts, POS, or the Reconciliation API? View the classic product documentation
Web SDK integration
Complete guide to integrating Peach Orchestration payments in web applications
Prerequisites
Before you start integrating, make sure you have a React development environment, Peach Orchestration credentials, and a backend server that can create Payment Intents.
Development environment
- React 17+ or 18+.
- Node.js 16+.
- npm, yarn, or pnpm.
Peach Payments account
Don't have an account yet? Sign up first.
Already have an account? Collect your credentials from the Dashboard:
Log in to the Dashboard
You can log in to the Dashboard using one of the following methods:
- Using a magic link; this is the default login method. After entering your email address, Dashboard sends you a magic link that you click to log in.
- Using a password.
Info
Log in using a magic link
To access the Dashboard:
- Visit https://dashboard.peachpayments.com.
- Enter your company email address and click Submit.
- In your email inbox, click the Login to Dashboard link that you received from Peach Payments (if you've got multiple login emails, click the latest link). If the email isn't in your inbox, check your spam folder. The magic link expires after five minutes, but you can redo this procedure to receive a new link.
- When the Dashboard prompts you for two-factor authentication:
- On your phone, open your authenticator app and note the 6-digit authentication code for Peach Payments.
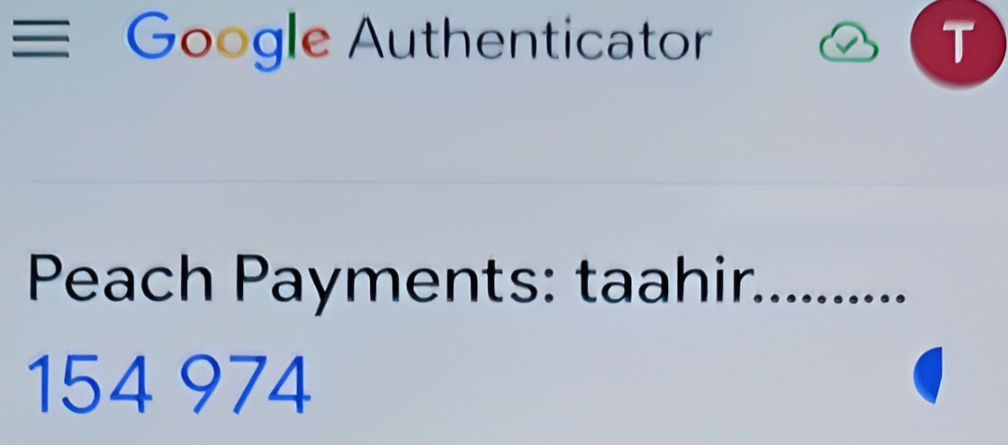
Example Google Authenticator authentication code. - In your browser, in the Verify Your Identity window, enter the authentication code.
- Select Remember this device for 30 days if you don't want the Dashboard to ask for an authentication code for the next 30 days.
- Click Continue.
- On your phone, open your authenticator app and note the 6-digit authentication code for Peach Payments.
Warning
Log in using a password
When you first gain access to the Dashboard, the email contains a link to either log in using a magic link, or to complete your account by setting a password. Use the password that you set there for all future logins, unless you reset it. If you can't find the initial email, you can set your first password using the reset your password functionality.
To access the Dashboard:
- Visit https://dashboard.peachpayments.com.
- Click Username & Password beneath the Submit button.
- Enter your company email address and password, and click Log in.
- When the Dashboard prompts you for two-factor authentication:
- On your phone, open your authenticator app and note the 6-digit authentication code for Peach Payments.
- In your browser, in the Verify Your Identity window, enter the authentication code.
- Select Remember this device for 30 days if you don't want the Dashboard to ask for an authentication code for the next 30 days.
- Click Continue.
- In the left sidebar, click Peach Orchestration.
- Under Peach Orchestration credentials, copy your profile ID (
pro_xxx) and publishable key (pk_snd_xxxfor sandbox,pk_prd_xxxfor live). The publishable key is safe to use in client-side code. - Under API keys, click New API key + to create a merchant API key (
snd_xxxfor sandbox,prd_xxxfor live).
Never ship your merchant API key
The merchant API key belongs on your server only. Never expose it in client-side code — a web page, a mobile app bundle, or anything else a shopper can read.
Can't find these credentials, or don't see the Peach Orchestration section? Contact support to request access.
Backend server
You need a server to create Payment Intents.
Keep your secret key server-side
Never expose your secret key in frontend code. Payment Intents are created by your server, which is the only place that key belongs.
TypeScript
TypeScript is recommended. Full type definitions are included, which gives you better IDE support and catches errors earlier.
Project setup
- Create React App, Next.js, Vite, or a similar toolchain.
- HTTPS, which is required in production.
Wallet prerequisites
Only relevant if you are accepting Apple Pay, Google Pay, or Samsung Pay.
Apple Pay (web only)
You can use the Peach Payments certificates, so you do not need your own merchant ID and payment processing certificate. You do still have to verify your domain:
- Download the Peach merchant domain verification file for the environment you are integrating against:
- Host that file at
{yourDomain}/.well-known/apple-developer-merchantid-domain-association.
Domain verification requirements
Do not add a .txt extension. The file must return HTTP 200 with no redirect,
and cannot sit behind a proxy, redirect, or password — Peach Payments needs
access to the well-known address to onboard the domain with Apple.
The same domain verification restrictions that Apple documents still apply. See Register and verify your domain.
Allow requests without a user-agent, or allowlist Apple's IP addresses as described in Setting up your server.
Google Pay (web only)
You can use the Peach Payments Google Pay ID.
Samsung Pay (web only)
You can use the Peach Payments Samsung Pay certificates.
Mobile apps need their own credentials
For Mobile SDK V2 wallet certificates and merchant IDs, see the Mobile SDK guides — app integrations cannot use the Peach certificates.
Load the Web SDK from the CDN, either with a script tag in your HTML shell or by injecting the script from a React effect.
No npm package yet
npm packages are not published yet — Peach Payments will publish its own. Until then, the CDN script tag is the only distribution channel.
Option 1: script tag in index.html
<script src="https://sdk.sandbox-next.peachpayments.com/sandbox/web/0.133.4/v1/HyperLoader.js"></script>Then initialise the SDK:
const hyper = Hyper('pk_test_your_publishable_key', {
  customBackendUrl: 'https://app.sandbox-next.peachpayments.com/api',
});
Option 2: dynamic load in React or Next.js
useEffect(() => {
  const script = document.createElement('script');
  script.src = 'https://sdk.sandbox-next.peachpayments.com/sandbox/web/0.133.4/v1/HyperLoader.js';
  script.async = true;
  script.onload = () => {
    const hyper = (window as any).Hyper('pk_test_your_publishable_key', {
      customBackendUrl: 'https://app.sandbox-next.peachpayments.com/api',
    });
    // store hyper and create elements...
  };
  document.head.appendChild(script);
  return () => {
    document.head.removeChild(script);
  };
}, []);
Next.js specific
For the Next.js App Router, load the script from a client component:
'use client';

// Load HyperLoader.js as above, then use window.Hyper
Configure the SDK once you have a client secret, and keep the instances in refs so they survive re-renders.
Declare the global Hyper that HyperLoader.js exposes:
declare const Hyper: (key: string, opts?: { customBackendUrl?: string }) => any;Basic setup
Store hyper and elements in refs so they persist across renders.
function App() {
  const [clientSecret, setClientSecret] = useState<string>('');
  const hyperRef = useRef<any>(null);
  const elementsRef = useRef<any>(null);

  useEffect(() => {
    // Create Payment Intent on mount
    fetch('/api/create-payment-intent', {
      method: 'POST',
      headers: { 'Content-Type': 'application/json' },
      body: JSON.stringify({ amount: 6500, currency: 'zar' }),
    })
      .then((res) => res.json())
      .then(({ clientSecret }) => setClientSecret(clientSecret));
  }, []);

  useEffect(() => {
    if (!clientSecret) return;

    const hyper = Hyper('pk_test_your_publishable_key', {
      customBackendUrl: 'https://app.sandbox-next.peachpayments.com/api',
    });
    hyperRef.current = hyper;

    const elements = hyper.elements({ clientSecret });
    elementsRef.current = elements;

    const paymentElement = elements.create('payment', { layout: 'tabs' });
    paymentElement.mount('#payment-element');

    return () => paymentElement.unmount();
  }, [clientSecret]);

  if (!clientSecret) return <div>Loading...</div>;

  return (
    <form>
      <div id="payment-element" />
      <CheckoutForm hyperRef={hyperRef} elementsRef={elementsRef} />
    </form>
  );
}
With appearance customisation
const appearance = {
  theme: 'stripe',
  variables: {
    colorPrimary: '#0066FF',
    borderRadius: '8px',
  },
};
Pass the appearance into hyper.elements({ clientSecret, appearance }):
useEffect(() => {
  if (!clientSecret) return;
  const hyper = Hyper('pk_test_your_publishable_key', {
    customBackendUrl: 'https://app.sandbox-next.peachpayments.com/api',
  });
  const elements = hyper.elements({ clientSecret, appearance });
  const paymentElement = elements.create('payment');
  paymentElement.mount('#payment-element');
  return () => paymentElement.unmount();
}, [clientSecret]);
Environment configuration
Read the key and API host from environment variables:
const hyper = Hyper(process.env.REACT_APP_HYPER_PUBLISHABLE_KEY!, {
  customBackendUrl: process.env.REACT_APP_HYPER_API_URL!,
});
Or for Next.js:
const hyper = Hyper(process.env.NEXT_PUBLIC_HYPER_PUBLISHABLE_KEY!, {
  customBackendUrl: process.env.NEXT_PUBLIC_HYPER_API_URL!,
});
A minimal integration is two components: an app component that fetches the client secret and mounts the Payment Element, and a checkout form that confirms the payment.
'use client';
import { useState, useEffect, useRef, FormEvent } from 'react';

declare const Hyper: (key: string, opts?: { customBackendUrl?: string }) => any;
Main app component
function App() {
  const [clientSecret, setClientSecret] = useState('');
  const [loading, setLoading] = useState(true);
  const hyperRef = useRef<any>(null);
  const elementsRef = useRef<any>(null);

  useEffect(() => {
    fetch('/api/create-payment-intent', {
      method: 'POST',
      headers: { 'Content-Type': 'application/json' },
      body: JSON.stringify({ amount: 6500, currency: 'zar' }),
    })
      .then((res) => res.json())
      .then(({ clientSecret }) => {
        setClientSecret(clientSecret);
        setLoading(false);
      });
  }, []);

  useEffect(() => {
    if (!clientSecret) return;

    const hyper = Hyper('pk_test_your_publishable_key', {
      customBackendUrl: 'https://app.sandbox-next.peachpayments.com/api',
    });
    hyperRef.current = hyper;

    const elements = hyper.elements({ clientSecret });
    elementsRef.current = elements;

    const paymentElement = elements.create('payment', { layout: 'tabs' });
    paymentElement.mount('#payment-element');

    return () => paymentElement.unmount();
  }, [clientSecret]);

  if (loading) return <div>Loading...</div>;

  return <CheckoutForm hyperRef={hyperRef} elementsRef={elementsRef} />;
}
Checkout form component
function CheckoutForm({
  hyperRef,
  elementsRef,
}: {
  hyperRef: React.RefObject<any>;
  elementsRef: React.RefObject<any>;
}) {
  const [error, setError] = useState<string | null>(null);
  const [processing, setProcessing] = useState(false);

  const handleSubmit = async (e: FormEvent) => {
    e.preventDefault();

    if (!hyperRef.current || !elementsRef.current) return;

    setProcessing(true);
    setError(null);

    const { error, paymentIntent } = await hyperRef.current.confirmPayment({
      elements: elementsRef.current,
      confirmParams: {
        return_url: `${window.location.origin}/payment-complete`,
      },
      redirect: 'if_required',
    });

    if (error) {
      setError(error.message ?? 'An error occurred');
      setProcessing(false);
    } else if (paymentIntent?.status === 'succeeded') {
      window.location.href = '/payment-success';
    }
  };

  return (
    <form onSubmit={handleSubmit}>
      <div id="payment-element" />

      {error && <div className="error">{error}</div>}

      <button type="submit" disabled={processing}>
        {processing ? 'Processing...' : 'Pay Now'}
      </button>
    </form>
  );
}

export default App;
The Payment Element decides what to show from your Payment Intent and the options you pass to elements.create. This section covers ordering, enabling and disabling methods, wallets, layouts, and inline redirects.
Payment method priority and ordering
Control the display order via the elements.create options:
const paymentElement = elements.create('payment', {
  // Methods appear in this order (first = top priority)
  paymentMethodOrder: [
    'card', // Cards first
    'apple_pay', // Apple Pay second
    'google_pay', // Google Pay third
    'samsung_pay', // Samsung Pay fourth
    'payjustnow', // BNPL last
  ],
});
paymentElement.mount('#payment-element');
Only the methods you specify appear; the others are hidden.
Enabling and disabling payment methods
Method 1: server-side control (recommended)
A custom hook, usePaymentIntent.ts, that asks your server for an intent limited to the methods you want:
function usePaymentIntent(options: PaymentIntentOptions) {
  const [clientSecret, setClientSecret] = useState<string>('');

  useEffect(() => {
    fetch('/api/create-payment-intent', {
      method: 'POST',
      headers: { 'Content-Type': 'application/json' },
      body: JSON.stringify({
        amount: options.amount,
        currency: options.currency,
        // Only enable specific payment methods
        payment_method_types: options.enabledMethods ?? ['card'],
      }),
    })
      .then((res) => res.json())
      .then((data) => setClientSecret(data.clientSecret));
  }, [options]);

  return clientSecret;
}
Using it in a component:
function Checkout({ cart }: { cart: Cart }) {
  // Enable methods based on business logic
  const enabledMethods = useMemo(() => {
    const methods = ['card'];

    // Add wallets
    methods.push('apple_pay', 'google_pay', 'samsung_pay');

    // Add BNPL for orders over R500
    if (cart.total >= 50000) {
      methods.push('payjustnow');
    }

    return methods;
  }, [cart]);

  const clientSecret = usePaymentIntent({
    amount: cart.total,
    currency: 'zar',
    enabledMethods,
  });

  // Use clientSecret to initialise elements and mount the payment element
}
Method 2: client-side filtering
const paymentElement = elements.create('payment', {
  // Only show cards in the UI
  paymentMethodOrder: ['card'],

  // Control wallet display
  wallets: {
    applePay: 'auto', // 'auto' | 'never' | 'always'
    googlePay: 'never', // Disable Google Pay
  },
});
Card network configuration
Card networks are configured in your Peach Payments Dashboard, under Payment methods > Live payment methods. You can enable or disable card payments (which controls Visa and Mastercard), American Express, and Diners Club there.
The SDK respects your Dashboard configuration.
Wallet configuration
Option 1: wallets integrated in the Payment Element
const paymentElement = elements.create('payment', {
  wallets: {
    applePay: 'auto', // Show if available
    googlePay: 'auto', // Show if available
  },
});
paymentElement.mount('#payment-element');
Option 2: separate wallet buttons
function WalletButtons({ hyper, amount }: { hyper: any; amount: number }) {
  const [paymentRequest, setPaymentRequest] = useState<any>(null);
  const buttonRef = useRef<HTMLDivElement>(null);

  useEffect(() => {
    if (!hyper) return;

    const pr = hyper.paymentRequest({
      country: 'ZA',
      currency: 'zar',
      total: { label: 'Your Store', amount },
    });

    pr.canMakePayment().then((result: any) => {
      if (result?.applePay || result?.googlePay) {
        setPaymentRequest(pr);
      }
    });
  }, [hyper, amount]);

  useEffect(() => {
    if (!paymentRequest || !buttonRef.current || !hyper) return;
    const els = hyper.elements();
    const prButton = els.create('paymentRequestButton', {
      paymentRequest,
      style: { paymentRequestButton: { height: '48px' } },
    });
    prButton.mount(buttonRef.current);
    return () => prButton.unmount();
  }, [paymentRequest, hyper]);

  if (!paymentRequest) return null;

  return (
    <div className="mb-4">
      <div ref={buttonRef} />
      <div className="text-center text-gray-500 my-2">or pay with card</div>
    </div>
  );
}
Layout options
Tab layout (the default):
const paymentElement = elements.create('payment', { layout: 'tabs' });
paymentElement.mount('#payment-element');
Accordion layout:
const paymentElement = elements.create('payment', {
  layout: {
    type: 'accordion',
    defaultCollapsed: false, // First item expanded
    radios: true, // Show radio buttons
    spacedAccordionItems: true, // Spacing between items
  },
});
paymentElement.mount('#payment-element');
Dynamic method configuration
interface CheckoutProps {
  cart: Cart;
  customer: Customer;
}

function DynamicCheckout({ cart, customer }: CheckoutProps) {
  const elementsRef = useRef<any>(null);

  // Determine available methods based on context
  const paymentConfig = useMemo(() => {
    const order: string[] = [];
    const wallets: Record<string, string> = {
      applePay: 'never',
      googlePay: 'never',
    };

    // Always show cards first
    order.push('card');

    // Enable wallets for mobile or Safari
    const isMobile = /iPhone|iPad|Android/i.test(navigator.userAgent);
    const isSafari = /Safari/i.test(navigator.userAgent);

    if (isMobile || isSafari) {
      wallets.applePay = 'auto';
      wallets.googlePay = 'auto';
      order.push('apple_pay', 'google_pay', 'samsung_pay');
    }

    // BNPL for qualifying orders
    if (cart.total >= 50000 && cart.total <= 500000) {
      order.push('payjustnow');
    }

    return { order, wallets };
  }, [cart, customer]);

  useEffect(() => {
    if (!elementsRef.current) return;
    const paymentElement = elementsRef.current.create('payment', {
      paymentMethodOrder: paymentConfig.order,
      wallets: paymentConfig.wallets,
    });
    paymentElement.mount('#payment-element');
    return () => paymentElement.unmount();
  }, [paymentConfig]);

  return <div id="payment-element" />;
}
Inline iframe redirection
By default a redirect payment method opens a full-screen overlay popout. Set inline_iframe_redirection_enabled to render the redirect inside your checkout form, in an embedded iframe. It goes on the same options object as layout. Pair it with sdkHandleConfirmPayment: the SDK confirms from inside the element, so it needs the return_url here.
const paymentElement = elements.create('payment', {
  // ...your existing options (layout, defaultValues, wallets, ...)
  inline_iframe_redirection_enabled: true,
  sdkHandleConfirmPayment: {
    confirmParams: { return_url: 'https://your-site.com/checkout/complete' },
  },
});Cards always pop out
Non-card redirects go inline. Cards (3DS) and express or one-click flows always pop out regardless of this flag — 3DS and ACS pages generally refuse to be framed.
Prerequisites
- This only takes effect when the connector returns a
redirect_inside_popupnext action, which requiresis_iframe_redirection_enabledon the Peach connector or merchant. Without that backend flag the option does nothing. - Your redirect targets must allow framing.
X-Frame-Options: DENYor a restrictiveframe-ancestorsrenders blank inside the iframe. Only enable it for alternative payment method pages you control or have verified.
Completion is detected by polling the payment intent (the embedded page advances it server-side), so it works cross-origin. There is a 15-minute backstop, and it settles cleanly if the shopper abandons the flow.
Available payment methods
Enable methods on your business profile.
| Category | Identifiers |
|---|---|
| Cards | card |
| Wallets | apple_pay, google_pay, samsung_pay, scan_to_pay, mpesa, maucas, blink_by_emtel, mcb_juice |
| Bank transfer | peach_eft, capitec_pay, pay_shap |
| BNPL | payjustnow, payflex, float, mobicred, happy_pay, rcs, zero_pay |
| Voucher / crypto | one_for_you, money_badger |
Saved cards require a customer session from your server, which you pass to hyper.elements alongside the client secret.
Checkout with saved cards
interface CheckoutData {
  clientSecret: string;
  customerSessionClientSecret?: string;
}

function CheckoutWithSavedCards() {
  const [checkoutData, setCheckoutData] = useState<CheckoutData | null>(null);
  const hyperRef = useRef<any>(null);
  const elementsRef = useRef<any>(null);

  useEffect(() => {
    // Fetch payment intent with customer session
    fetch('/api/checkout-session', {
      method: 'POST',
      headers: { 'Content-Type': 'application/json' },
      body: JSON.stringify({ customerId: 'cus_xxx' }),
    })
      .then((res) => res.json())
      .then(setCheckoutData);
  }, []);

  useEffect(() => {
    if (!checkoutData) return;

    const hyper = Hyper('pk_test_your_publishable_key', {
      customBackendUrl: 'https://app.sandbox-next.peachpayments.com/api',
    });
    hyperRef.current = hyper;

    const elements = hyper.elements({
      clientSecret: checkoutData.clientSecret,
      customerSessionClientSecret: checkoutData.customerSessionClientSecret,
    });
    elementsRef.current = elements;

    const paymentElement = elements.create('payment');
    paymentElement.mount('#payment-element');

    return () => paymentElement.unmount();
  }, [checkoutData]);

  if (!checkoutData) return <div>Loading...</div>;

  return (
    <form>
      <div id="payment-element" />
      <CheckoutForm hyperRef={hyperRef} elementsRef={elementsRef} />
    </form>
  );
}
Setup Intents: save a card without a payment
function SaveCardPage() {
  const [clientSecret, setClientSecret] = useState('');
  const hyperRef = useRef<any>(null);
  const elementsRef = useRef<any>(null);
  const [loading, setLoading] = useState(false);

  useEffect(() => {
    fetch('/api/create-setup-intent', { method: 'POST' })
      .then((res) => res.json())
      .then(({ clientSecret }) => setClientSecret(clientSecret));
  }, []);

  useEffect(() => {
    if (!clientSecret) return;

    const hyper = Hyper('pk_test_your_publishable_key', {
      customBackendUrl: 'https://app.sandbox-next.peachpayments.com/api',
    });
    hyperRef.current = hyper;

    const elements = hyper.elements({ clientSecret });
    elementsRef.current = elements;

    const paymentElement = elements.create('payment');
    paymentElement.mount('#save-card-element');

    return () => paymentElement.unmount();
  }, [clientSecret]);

  const handleSaveCard = async () => {
    if (!hyperRef.current || !elementsRef.current) return;

    setLoading(true);

    const { error, setupIntent } = await hyperRef.current.confirmSetup({
      elements: elementsRef.current,
      confirmParams: {
        return_url: `${window.location.origin}/card-saved`,
      },
    });

    if (error) {
      console.error(error);
      setLoading(false);
    } else if (setupIntent?.status === 'succeeded') {
      console.log('Card saved!');
    }
  };

  if (!clientSecret) return <div>Loading...</div>;

  return (
    <div>
      <div id="save-card-element" />
      <button onClick={handleSaveCard} disabled={loading}>
        {loading ? 'Saving...' : 'Save Card'}
      </button>
    </div>
  );
}
Handle the two outcomes of confirmPayment separately: an error object, which you map to a shopper-facing message by type and code, and a paymentIntent, which you route on by status.
import { useState, useRef } from 'react';Checkout form with error handling
function CheckoutForm({
  hyperRef,
  elementsRef,
}: {
  hyperRef: React.RefObject<any>;
  elementsRef: React.RefObject<any>;
}) {
  const [error, setError] = useState<string | null>(null);
  const [processing, setProcessing] = useState(false);

  const handleSubmit = async (e: React.FormEvent) => {
    e.preventDefault();
    if (!hyperRef.current || !elementsRef.current) return;

    setProcessing(true);
    setError(null);

    try {
      const { error, paymentIntent } = await hyperRef.current.confirmPayment({
        elements: elementsRef.current,
        confirmParams: {
          return_url: `${window.location.origin}/complete`,
        },
        redirect: 'if_required',
      });

      if (error) {
        handleError(error);
      } else if (paymentIntent) {
        handlePaymentIntent(paymentIntent);
      }
    } catch (e) {
      setError('An unexpected error occurred');
      console.error(e);
    } finally {
      setProcessing(false);
    }
  };

  const handleError = (error: any) => {
    switch (error.type) {
      case 'card_error':
        setError(getCardErrorMessage(error.code));
        break;
      case 'validation_error':
        setError('Please check your payment details');
        break;
      case 'api_error':
        setError('Server error. Please try again.');
        break;
      default:
        setError(error.message ?? 'An error occurred');
    }
  };

  const getCardErrorMessage = (code?: string): string => {
    const messages: Record<string, string> = {
      card_declined: 'Your card was declined',
      expired_card: 'Your card has expired',
      incorrect_cvc: 'Incorrect security code',
      insufficient_funds: 'Insufficient funds',
      processing_error: 'Processing error. Try again.',
    };
    return messages[code ?? ''] ?? 'Card error. Please try again.';
  };

  const handlePaymentIntent = (paymentIntent: any) => {
    switch (paymentIntent.status) {
      case 'succeeded':
        window.location.href = '/success';
        break;
      case 'processing':
        setError('Payment is processing. We will notify you.');
        break;
      case 'requires_payment_method':
        setError('Payment failed. Try another method.');
        break;
    }
  };

  return (
    <form onSubmit={handleSubmit}>
      {/* The payment element emits inline validation.
          Listen via paymentElement.on('change', ...) for real-time feedback. */}
      <div id="payment-element" />

      {error && (
        <div className="bg-red-50 text-red-600 p-3 rounded mt-4">{error}</div>
      )}

      <button
        type="submit"
        disabled={processing}
        className="w-full mt-4 py-3 bg-blue-600 text-white rounded"
      >
        {processing ? 'Processing...' : 'Pay Now'}
      </button>
    </form>
  );
}
The Payment Element is themed with an appearance object passed to hyper.elements, and its behaviour is tuned with the options passed to elements.create.
Appearance configuration
const appearance = {
  theme: 'stripe',

  variables: {
    colorPrimary: '#0066FF',
    colorBackground: '#ffffff',
    colorText: '#1a1a1a',
    colorDanger: '#dc2626',
    fontFamily: 'Inter, system-ui, sans-serif',
    borderRadius: '8px',
    spacingUnit: '4px',
  },

  rules: {
    '.Input': {
      border: '1px solid #e5e7eb',
      padding: '12px',
      fontSize: '16px',
    },
    '.Input:focus': {
      borderColor: '#0066FF',
      boxShadow: '0 0 0 2px rgba(0, 102, 255, 0.2)',
    },
    '.Label': {
      fontWeight: '500',
      marginBottom: '8px',
    },
    '.Tab--selected': {
      backgroundColor: '#0066FF',
      color: '#ffffff',
    },
  },
};
Pass the appearance into hyper.elements({ clientSecret, appearance }):
useEffect(() => {
  if (!clientSecret) return;
  const hyper = Hyper('pk_test_your_publishable_key', {
    customBackendUrl: 'https://app.sandbox-next.peachpayments.com/api',
  });
  const elements = hyper.elements({ clientSecret, appearance });
  const paymentElement = elements.create('payment');
  paymentElement.mount('#payment-element');
  return () => paymentElement.unmount();
}, [clientSecret]);
Dark mode support
Define an appearance per colour scheme:
const lightAppearance = {
  theme: 'stripe',
  variables: { colorPrimary: '#0066FF', colorBackground: '#ffffff' },
};

const darkAppearance = {
  theme: 'night',
  variables: { colorPrimary: '#4da3ff', colorBackground: '#1a1a1a' },
};
Then follow the shopper's system preference and re-create the element when it changes:
function ThemedCheckout({ clientSecret }: { clientSecret: string }) {
  const [isDark, setIsDark] = useState(
    window.matchMedia('(prefers-color-scheme: dark)').matches,
  );
  const elementsRef = useRef<any>(null);

  useEffect(() => {
    const mediaQuery = window.matchMedia('(prefers-color-scheme: dark)');
    const handler = (e: MediaQueryListEvent) => setIsDark(e.matches);
    mediaQuery.addEventListener('change', handler);
    return () => mediaQuery.removeEventListener('change', handler);
  }, []);

  useEffect(() => {
    if (!clientSecret) return;
    const hyper = Hyper('pk_test_your_publishable_key', {
      customBackendUrl: 'https://app.sandbox-next.peachpayments.com/api',
    });
    const elements = hyper.elements({
      clientSecret,
      appearance: isDark ? darkAppearance : lightAppearance,
    });
    elementsRef.current = elements;
    const paymentElement = elements.create('payment');
    paymentElement.mount('#payment-element');
    return () => paymentElement.unmount();
  }, [clientSecret, isDark]);

  return (
    <form>
      <div id="payment-element" />
    </form>
  );
}
Payment Element options
Options passed to elements.create('payment', { ... }):
const paymentElement = elements.create('payment', {
  layout: {
    type: 'accordion',
    defaultCollapsed: false,
    radios: true,
  },
  business: {
    name: 'Your Store',
  },
  fields: {
    billingDetails: {
      name: 'auto',
      email: 'auto',
      phone: 'never',
      address: {
        country: 'auto',
        postalCode: 'auto',
      },
    },
  },
});
Use the sandbox test cards to exercise each outcome, then cover your components with unit tests and the full flow with an end-to-end test.
Test cards
| Scenario | Card number |
|---|---|
| Success | 4242 4242 4242 4242 |
| 3DS required | 4000 0025 0000 3155 |
| Declined | 4000 0000 0000 0002 |
Unit testing components
Mock the global Hyper function, which is loaded via the CDN HyperLoader.js:
import { render, screen, fireEvent, waitFor } from '@testing-library/react';
import CheckoutForm from './CheckoutForm';

const mockPaymentElement = {
  mount: jest.fn(),
  unmount: jest.fn(),
  on: jest.fn(),
};

const mockElements = {
  create: jest.fn(() => mockPaymentElement),
  getElement: jest.fn(),
};

const mockHyper = {
  elements: jest.fn(() => mockElements),
  confirmPayment: jest.fn(),
};

beforeEach(() => {
  (window as any).Hyper = jest.fn(() => mockHyper);
});

describe('CheckoutForm', () => {
  it('renders payment form', () => {
    render(
      <CheckoutForm
        hyperRef={{ current: mockHyper }}
        elementsRef={{ current: mockElements }}
      />,
    );

    expect(screen.getByRole('button', { name: /pay/i })).toBeInTheDocument();
  });

  it('shows error on payment failure', async () => {
    mockHyper.confirmPayment.mockResolvedValue({
      error: { type: 'card_error', message: 'Card declined' },
    });

    render(
      <CheckoutForm
        hyperRef={{ current: mockHyper }}
        elementsRef={{ current: mockElements }}
      />,
    );

    fireEvent.click(screen.getByRole('button', { name: /pay/i }));

    await waitFor(() => {
      expect(screen.getByText(/card declined/i)).toBeInTheDocument();
    });
  });
});
End-to-end testing with Playwright
In tests/checkout.spec.ts:
import { test, expect } from '@playwright/test';

test('complete checkout flow', async ({ page }) => {
  await page.goto('/checkout');

  // Wait for payment element
  const paymentFrame = page.frameLocator('iframe[name^="__privateHyper"]');
  await paymentFrame.locator('[name="cardnumber"]').fill('4242424242424242');
  await paymentFrame.locator('[name="exp-date"]').fill('1234');
  await paymentFrame.locator('[name="cvc"]').fill('123');

  // Submit
  await page.click('button[type="submit"]');

  // Verify success
  await expect(page).toHaveURL(/\/success/);
});
Most React integration problems come down to timing: the SDK being created before the client secret exists, or being re-created on every render.
Payment Element not mounting
Ensure clientSecret is set before creating elements.
function App() {
  const [clientSecret, setClientSecret] = useState('');

  useEffect(() => {
    if (!clientSecret) return; // Wait until we have a secret

    const hyper = Hyper('pk_test_xxx', {
      customBackendUrl: 'https://app.sandbox-next.peachpayments.com/api',
    });
    const elements = hyper.elements({ clientSecret });
    const paymentElement = elements.create('payment');
    paymentElement.mount('#payment-element');

    return () => paymentElement.unmount();
  }, [clientSecret]);

  return <div id="payment-element" />;
}
Elements not rendering
Check that clientSecret is valid and not empty.
function App() {
  const [clientSecret, setClientSecret] = useState('');

  useEffect(() => {
    fetch('/api/create-payment-intent', { method: 'POST' /* ... */ })
      .then((res) => res.json())
      .then((data) => setClientSecret(data.clientSecret));
  }, []);

  // The SDK effect above runs when clientSecret changes
  return <div id="payment-element" />;
}
"Cannot read properties of null"
Always check refs before using them.
const handleSubmit = async () => {
  if (!hyperRef.current || !elementsRef.current) {
    console.log('SDK not ready');
    return;
  }
  // ... proceed
};
Stale closure in event handlers
Use refs, or useCallback with the correct dependencies.
const clientSecretRef = useRef(clientSecret);
useEffect(() => {
  clientSecretRef.current = clientSecret;
}, [clientSecret]);
Next.js "window is not defined"
Load Hyper only on the client side — use 'use client' and useEffect.
'use client';

useEffect(() => {
  // Runs only on client
  const hyper = Hyper('pk_test_xxx', {
    customBackendUrl: 'https://app.sandbox-next.peachpayments.com/api',
  });
  // ...
}, []);
Re-renders re-initialising the SDK
Store hyper and elements in refs, not in component state.
Wrong, because this creates a new Hyper instance on every render:
function AppBad() {
  const hyper = Hyper('pk_test_xxx'); // Bad! Called on every render
}
Correct — initialise inside useEffect and store the instance in a ref:
function App() {
  const hyperRef = useRef<any>(null);

  useEffect(() => {
    hyperRef.current = Hyper('pk_test_xxx', {
      customBackendUrl: 'https://app.sandbox-next.peachpayments.com/api',
    });
    // create elements and mount...
  }, [clientSecret]); // only re-run when clientSecret changes
}
Content Security Policy blocking the SDK
Add these directives to your CSP header:
Content-Security-Policy: script-src 'self' https://app.sandbox-next.peachpayments.com; frame-src 'self' https://app.sandbox-next.peachpayments.com; connect-src 'self' https://app.sandbox-next.peachpayments.com https://*.peachpayments.com; style-src 'self' 'unsafe-inline';The element's own CSP is not yours to set
The Payment Element renders in a sandboxed iframe. Any connect-src
directives inside that iframe are controlled by the SDK host, not your app. If
the SDK makes internal requests to the wrong host, your app's CSP cannot fix
it — that requires the SDK version to be updated.
Getting help
Contact support for help.