Using Payment Links, Payment Page, payment extensions, Payouts, POS, or the Reconciliation API? View the classic product documentation
Web SDK integration
Complete guide to integrating Peach Orchestration payments in web applications
Prerequisites
Before you start integrating, make sure you have a development environment, Peach Orchestration credentials, and a backend server that can create Payment Intents.
Development environment
- A modern web browser: Chrome, Firefox, Safari, or Edge.
- HTTPS, which is required in production.
Peach Payments account
Don't have an account yet? Sign up first.
Already have an account? Collect your credentials from the Dashboard:
Log in to the Dashboard
You can log in to the Dashboard using one of the following methods:
- Using a magic link; this is the default login method. After entering your email address, Dashboard sends you a magic link that you click to log in.
- Using a password.
Info
Log in using a magic link
To access the Dashboard:
- Visit https://dashboard.peachpayments.com.
- Enter your company email address and click Submit.
- In your email inbox, click the Login to Dashboard link that you received from Peach Payments (if you've got multiple login emails, click the latest link). If the email isn't in your inbox, check your spam folder. The magic link expires after five minutes, but you can redo this procedure to receive a new link.
- When the Dashboard prompts you for two-factor authentication:
- On your phone, open your authenticator app and note the 6-digit authentication code for Peach Payments.
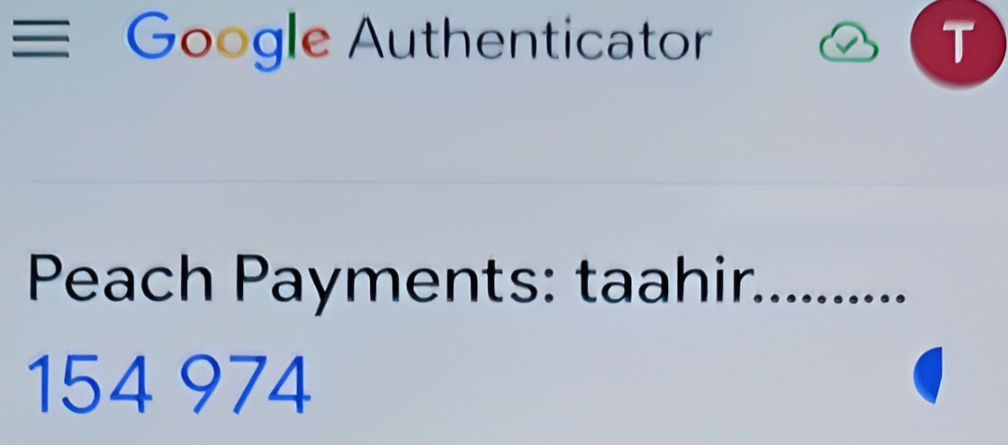
Example Google Authenticator authentication code. - In your browser, in the Verify Your Identity window, enter the authentication code.
- Select Remember this device for 30 days if you don't want the Dashboard to ask for an authentication code for the next 30 days.
- Click Continue.
- On your phone, open your authenticator app and note the 6-digit authentication code for Peach Payments.
Warning
Log in using a password
When you first gain access to the Dashboard, the email contains a link to either log in using a magic link, or to complete your account by setting a password. Use the password that you set there for all future logins, unless you reset it. If you can't find the initial email, you can set your first password using the reset your password functionality.
To access the Dashboard:
- Visit https://dashboard.peachpayments.com.
- Click Username & Password beneath the Submit button.
- Enter your company email address and password, and click Log in.
- When the Dashboard prompts you for two-factor authentication:
- On your phone, open your authenticator app and note the 6-digit authentication code for Peach Payments.
- In your browser, in the Verify Your Identity window, enter the authentication code.
- Select Remember this device for 30 days if you don't want the Dashboard to ask for an authentication code for the next 30 days.
- Click Continue.
- In the left sidebar, click Peach Orchestration.
- Under Peach Orchestration credentials, copy your profile ID (
pro_xxx) and publishable key (pk_snd_xxxfor sandbox,pk_prd_xxxfor live). The publishable key is safe to use in client-side code. - Under API keys, click New API key + to create a merchant API key (
snd_xxxfor sandbox,prd_xxxfor live).
Never ship your merchant API key
The merchant API key belongs on your server only. Never expose it in client-side code — a web page, a mobile app bundle, or anything else a shopper can read.
Can't find these credentials, or don't see the Peach Orchestration section? Contact support to request access.
Backend server
You need a server to create Payment Intents. It must:
- Keep your secret key server-side, never in frontend code.
- Handle CORS for your domain.
Browser requirements
Shoppers need JavaScript enabled and cookies enabled, the latter for fraud prevention. The minimum supported browser versions are Chrome 70+, Firefox 63+, Safari 12+, and Edge 79+.
Security considerations
- Always use HTTPS in production.
- Configure a Content Security Policy (CSP).
- Set up the correct CORS headers on your server.
Wallet prerequisites
Only relevant if you are accepting Apple Pay, Google Pay, or Samsung Pay.
Apple Pay (web only)
You can use the Peach Payments certificates, so you do not need your own merchant ID and payment processing certificate. You do still have to verify your domain:
- Download the Peach merchant domain verification file for the environment you are integrating against:
- Host that file at
{yourDomain}/.well-known/apple-developer-merchantid-domain-association.
Domain verification requirements
Do not add a .txt extension. The file must return HTTP 200 with no redirect,
and cannot sit behind a proxy, redirect, or password — Peach Payments needs
access to the well-known address to onboard the domain with Apple.
The same domain verification restrictions that Apple documents still apply. See Register and verify your domain.
Allow requests without a user-agent, or allowlist Apple's IP addresses as described in Setting up your server.
Google Pay (web only)
You can use the Peach Payments Google Pay ID.
Samsung Pay (web only)
You can use the Peach Payments Samsung Pay certificates.
Mobile apps need their own credentials
For Mobile SDK V2 wallet certificates and merchant IDs, see the Mobile SDK guides — app integrations cannot use the Peach certificates.
Load the Web SDK from the CDN with a script tag.
No npm package yet
npm packages are not published yet — Peach Payments will publish its own. Until then, the CDN script tag is the only distribution channel.
Add the script tag
Add the loader to your HTML <head>:
<script src="https://sdk.sandbox-next.peachpayments.com/sandbox/web/0.133.4/v1/HyperLoader.js"></script>Then initialise the SDK in your JavaScript:
const hyper = Hyper('pk_test_your_publishable_key', {
  customBackendUrl: 'https://app.sandbox-next.peachpayments.com/api',
});
Verifying the installation
Check that the SDK loaded correctly:
if (typeof Hyper !== 'undefined') {
  console.log('Hyper SDK loaded successfully');
} else {
  console.error('Failed to load Hyper SDK');
}
Configure the SDK once per page load with your publishable key and the API host it should talk to.
Basic initialisation
const hyper = Hyper('pk_test_your_publishable_key', {
  customBackendUrl: 'https://app.sandbox-next.peachpayments.com/api',
});
With custom options:
const hyper = Hyper('pk_test_your_publishable_key', {
  customBackendUrl: 'https://app.sandbox-next.peachpayments.com/api',

  // Locale for UI elements
  locale: 'en',
});
Environment configuration
Use different keys for different environments:
const config = {
  development: {
    publishableKey: 'pk_test_xxx',
    customBackendUrl: 'https://app.sandbox-next.peachpayments.com/api',
  },
  production: {
    publishableKey: 'pk_live_xxx',
    customBackendUrl: 'https://app.next.peachpayments.com/api',
  },
};

const env =
  window.location.hostname === 'localhost' ? 'development' : 'production';

const hyper = Hyper(config[env].publishableKey, {
  customBackendUrl: config[env].customBackendUrl,
});
Creating Elements
Elements are created with a client secret from your server:
async function initializePayment() {
  // 1. Get client secret from your server
  const response = await fetch('/api/create-payment-intent', {
    method: 'POST',
    headers: { 'Content-Type': 'application/json' },
    body: JSON.stringify({
      amount: 6500,
      currency: 'zar',
    }),
  });
  const { clientSecret } = await response.json();

  // 2. Create Elements instance
  const elements = hyper.elements({
    clientSecret,
    appearance: {
      theme: 'stripe', // or 'night', 'flat', 'none'
    },
  });

  return elements;
}
A complete checkout flow: initialise the SDK, create a Payment Intent on your server, mount the Payment Element, and confirm the payment on submit.
Checkout page
class CheckoutPage {
  constructor() {
    this.hyper = null;
    this.elements = null;
    this.paymentElement = null;
  }

  // Step 1: Initialize when page loads
  async initialize() {
    // Load Hyper SDK
    this.hyper = Hyper('pk_test_your_publishable_key', {
      customBackendUrl: 'https://app.sandbox-next.peachpayments.com/api',
    });

    // Create payment intent on your server
    const response = await fetch('/api/create-payment-intent', {
      method: 'POST',
      headers: { 'Content-Type': 'application/json' },
      body: JSON.stringify({
        amount: 6500, // Amount in smallest unit (cents)
        currency: 'zar', // ISO currency code
      }),
    });
    const { clientSecret } = await response.json();

    // Create Elements
    this.elements = this.hyper.elements({ clientSecret });

    // Create and mount Payment Element
    this.paymentElement = this.elements.create('payment', {
      layout: 'tabs', // or 'accordion'
    });
    this.paymentElement.mount('#payment-element');

    // Set up form submission
    document
      .getElementById('payment-form')
      .addEventListener('submit', (e) => this.handleSubmit(e));
  }

  // Step 2: Handle form submission
  async handleSubmit(event) {
    event.preventDefault();

    const submitButton = document.getElementById('submit-button');
    submitButton.disabled = true;
    submitButton.textContent = 'Processing...';

    const { error, paymentIntent } = await this.hyper.confirmPayment({
      elements: this.elements,
      confirmParams: {
        return_url: window.location.origin + '/payment-complete',
      },
      // Set to true to not redirect on success
      // redirect: 'if_required',
    });

    if (error) {
      // Show error to customer
      const errorElement = document.getElementById('error-message');
      errorElement.textContent = error.message;
      submitButton.disabled = false;
      submitButton.textContent = 'Pay Now';
    } else if (paymentIntent && paymentIntent.status === 'succeeded') {
      // Payment succeeded without redirect
      window.location.href = '/payment-success';
    }
  }
}

// Initialise on page load
document.addEventListener('DOMContentLoaded', () => {
  const checkout = new CheckoutPage();
  checkout.initialize();
});
HTML structure
<form id="payment-form">
  <div id="payment-element"></div>
  <div id="error-message"></div>
  <button id="submit-button" type="submit">Pay Now</button>
</form>
The Payment Element automatically shows the payment methods available to you, based on your Peach Payments Dashboard configuration.
Payment method priority and ordering
Control the display order of payment methods. Methods appear in the order given, so the first is the top priority:
const paymentElement = elements.create('payment', {
  paymentMethodOrder: [
    'card', // Cards first
    'apple_pay', // Apple Pay second
    'google_pay', // Google Pay third
    'samsung_pay', // Samsung Pay fourth
    'payjustnow', // BNPL last
  ],
});
Only the methods you specify appear; the rest are hidden. If one of the listed methods isn't available, it is simply skipped.
Enabling and disabling payment methods
Method 1: server-side (recommended)
Control the available methods when creating the Payment Intent:
const paymentIntent = await fetch('/api/create-payment-intent', {
  method: 'POST',
  body: JSON.stringify({
    amount: 6500,
    currency: 'zar',
    // Only allow these specific payment methods
    payment_method_types: ['card', 'apple_pay'],
    // OR allow automatic detection
    // payment_method_types: 'automatic',
  }),
});
On your server, in Node.js:
app.post('/api/create-payment-intent', async (req, res) => {
  const paymentIntent = await peach.paymentIntents.create({
    amount: req.body.amount,
    currency: req.body.currency,
    // Explicitly enable only these methods
    payment_method_types: ['card', 'google_pay'],
    // Or use automatic detection based on currency/country
    // automatic_payment_methods: { enabled: true },
  });
  res.json({ clientSecret: paymentIntent.client_secret });
});
Method 2: client-side filtering
Client-side filtering hides methods visually, but your server still accepts them:
const paymentElement = elements.create('payment', {
  // Only show these methods in the UI
  paymentMethodOrder: ['card'], // Only cards visible

  // Or use wallets configuration
  wallets: {
    applePay: 'auto', // 'auto', 'never', or 'always'
    googlePay: 'never', // Disable Google Pay
  },
});
Card network priority
Which card networks appear is configured in the Peach Payments Dashboard, not in code:
- Go to Payment methods > Live payment methods.
- Enable or disable specific networks. Card payment controls Visa and Mastercard; American Express and Diners Club are separate.
The SDK respects your Dashboard configuration and only shows the card networks you have enabled.
Conditional payment methods
Show different methods depending on the browser or the basket:
async function createPaymentIntent(cart) {
  const paymentMethods = ['card']; // Always allow cards

  // Add Apple Pay for supported browsers
  if (window.ApplePaySession) {
    paymentMethods.push('apple_pay');
  }

  // Add BNPL only for orders over R500
  if (cart.total >= 50000) {
    // 500 ZAR in cents
    paymentMethods.push('payjustnow');
  }

  const response = await fetch('/api/create-payment-intent', {
    method: 'POST',
    body: JSON.stringify({
      amount: cart.total,
      currency: 'zar',
      payment_method_types: paymentMethods,
    }),
  });

  return response.json();
}
Wallet configuration
Each wallet takes 'auto', 'never', or 'always':
const paymentElement = elements.create('payment', {
  wallets: {
    // Apple Pay: 'auto' | 'never' | 'always'
    applePay: 'auto', // Show if available

    // Google Pay: 'auto' | 'never' | 'always'
    googlePay: 'auto', // Show if available
  },
});
Check wallet availability before showing your own UI:
const paymentRequest = hyper.paymentRequest({
  country: 'ZA',
  currency: 'zar',
  total: { label: 'Your Store', amount: 6500 },
  requestPayerName: true,
  requestPayerEmail: true,
});

const canPay = await paymentRequest.canMakePayment();
console.log('Apple Pay:', canPay?.applePay); // true/false
console.log('Google Pay:', canPay?.googlePay); // true/false
Layout options
Tab layout is the default, and shows methods as horizontal tabs:
const paymentElement = elements.create('payment', {
  layout: 'tabs',
});
Accordion layout shows methods as expandable sections:
const paymentElement = elements.create('payment', {
  layout: {
    type: 'accordion',
    defaultCollapsed: false, // First item expanded
    radios: true, // Show radio buttons
    spacedAccordionItems: true, // Add spacing between items
  },
});
Inline iframe redirection
By default, a redirect payment method opens a full-screen overlay popout. Set inline_iframe_redirection_enabled to render the redirect inside your checkout form instead, in an embedded iframe.
It sits on the same options object as layout and defaultValues. When it is on, also pass sdkHandleConfirmPayment with the return_url: the SDK confirms from inside the element, so it needs the return URL here.
const options = {
  // ...your existing options (layout, defaultValues, wallets, ...)
  inline_iframe_redirection_enabled: true,
  sdkHandleConfirmPayment: {
    confirmParams: { return_url: 'https://your-site.com/checkout/complete' },
  },
};
const paymentElement = elements.create('payment', options);
What it affects
| Payment method | Option off (default) | Option on |
|---|---|---|
| Non-card redirect | Full-screen popout | Inline in the form |
| Card (3DS) | Full-screen popout | Full-screen popout |
| Express/one-click | Full-screen popout | Full-screen popout |
Cards always pop out
Cards pop out regardless of this flag, because 3DS and ACS pages generally refuse to be framed.
Prerequisites
- The backend flag does the real work. This option only takes effect when the connector returns a
redirect_inside_popupnext action, which requiresis_iframe_redirection_enabledon the Peach connector or merchant. Without it, redirects are a normal full-page redirect and this option does nothing. - Your redirect targets must allow framing. A page sending
X-Frame-Options: DENYor a restrictiveframe-ancestorsrenders blank inside the inline iframe. Only enable this for alternative payment method pages you control or have verified.
Completion
The embedded page advances the intent server-side, so completion is detected by polling the payment intent — that is what makes it work cross-origin. There is a 15-minute backstop, and the flow settles cleanly if the shopper abandons it.
Available payment methods
Enable the methods you want on your business profile.
| Category | Identifiers |
|---|---|
| Cards | card — Visa, Mastercard, Amex, Diners Club |
| Wallets | apple_pay, google_pay, samsung_pay, scan_to_pay |
| Wallets (regional) | mpesa (KE), maucas, blink_by_emtel, mcb_juice (MU) |
| Bank transfer | peach_eft, capitec_pay, pay_shap |
| Buy now, pay later | payjustnow, payflex, float, mobicred, happy_pay, rcs, zero_pay |
| Voucher and crypto | one_for_you, money_badger |
To offer saved cards you need to create a customer in Peach Orchestration, pass the customer when creating the Payment Intent, and generate a customer session for the checkout.
Step 1: Create a customer
On your server:
POST /customers
{
    "email": "customer@example.com",
    "name": "John Doe"
}
The response returns the customer ID:
{ "customer_id": "cus_xxx" }Step 2: Create a Payment Intent with the customer
Your server creates the Payment Intent against that customer. setup_future_usage is what saves the card:
POST /payments
{
    "amount": 6500,
    "currency": "zar",
    "customer_id": "cus_xxx",
    "setup_future_usage": "off_session"
}
Step 3: Initialise with a customer session
Passing customerSessionClientSecret alongside the client secret is what surfaces the customer's saved cards in the Payment Element:
async function initializeForReturningCustomer() {
  // Get payment data including customer session
  const response = await fetch('/api/checkout-session', {
    method: 'POST',
    headers: { 'Content-Type': 'application/json' },
    body: JSON.stringify({ customerId: 'cus_xxx' }),
  });

  const { clientSecret, customerSessionClientSecret } = await response.json();

  // Initialise Elements with customer session
  const elements = hyper.elements({
    clientSecret,
    customerSessionClientSecret, // Enables saved cards
  });

  const paymentElement = elements.create('payment');
  paymentElement.mount('#payment-element');
}
Setup Intents: save a card without a payment
Use a Setup Intent to save a card outside a purchase — from an account page, for example. Confirm it with confirmSetup() rather than confirmPayment():
async function saveCardForLater() {
  // Create Setup Intent on your server
  const response = await fetch('/api/create-setup-intent', {
    method: 'POST',
    headers: { 'Content-Type': 'application/json' },
    body: JSON.stringify({ customerId: 'cus_xxx' }),
  });
  const { clientSecret } = await response.json();

  const elements = hyper.elements({ clientSecret });
  const paymentElement = elements.create('payment');
  paymentElement.mount('#payment-element');

  // Confirm setup (saves card without charging)
  const { error, setupIntent } = await hyper.confirmSetup({
    elements,
    confirmParams: {
      return_url: 'https://yoursite.com/card-saved',
    },
  });

  if (setupIntent && setupIntent.status === 'succeeded') {
    console.log('Card saved successfully!');
  }
}
Charging a saved card
Once a card is saved, charge it from your server:
POST /payments
{
    "amount": 6500,
    "currency": "zar",
    "customer_id": "cus_xxx",
    "payment_method": "pm_xxx",
    "off_session": true,
    "confirm": true
}
confirmPayment() resolves with either an error or a paymentIntent, so branch on which one you got and handle each case.
Handling confirmation errors
async function handlePayment() {
  const { error, paymentIntent } = await hyper.confirmPayment({
    elements,
    confirmParams: {
      return_url: 'https://yoursite.com/complete',
    },
    redirect: 'if_required',
  });

  if (error) {
    handleError(error);
  } else if (paymentIntent) {
    handlePaymentIntent(paymentIntent);
  }
}
Error types
function handleError(error) {
  switch (error.type) {
    case 'card_error':
      // Card was declined or has issues
      handleCardError(error);
      break;

    case 'validation_error':
      // Form inputs are invalid
      showMessage('Please check your payment details.');
      break;

    case 'api_error':
      // Server-side error
      showMessage('Something went wrong. Please try again.');
      console.error('API Error:', error.message);
      break;

    case 'authentication_error':
      // 3DS authentication failed
      showMessage('Authentication failed. Please try again.');
      break;

    case 'rate_limit_error':
      // Too many requests
      showMessage('Please wait a moment and try again.');
      break;

    case 'invalid_request_error':
      // Invalid parameters
      console.error('Invalid request:', error.message);
      showMessage('Something went wrong.');
      break;

    default:
      showMessage(error.message || 'An error occurred.');
  }
}
Card error codes
Map card error codes to messages a shopper can act on:
function handleCardError(error) {
  const messages = {
    card_declined: 'Your card was declined. Please try another card.',
    expired_card: 'Your card has expired.',
    incorrect_cvc: 'The security code is incorrect.',
    insufficient_funds: 'Insufficient funds.',
    incorrect_number: 'The card number is incorrect.',
    processing_error: 'Processing error. Please try again.',
    invalid_expiry_month: 'Invalid expiration month.',
    invalid_expiry_year: 'Invalid expiration year.',
  };

  const message = messages[error.code] || error.message;
  showMessage(message);
}
Payment Intent status handling
function handlePaymentIntent(paymentIntent) {
  switch (paymentIntent.status) {
    case 'succeeded':
      showMessage('Payment successful!');
      redirectToSuccess();
      break;

    case 'processing':
      showMessage('Payment is processing...');
      pollPaymentStatus(paymentIntent.id);
      break;

    case 'requires_payment_method':
      showMessage('Payment failed. Please try another method.');
      break;

    case 'requires_action':
      // Additional authentication needed
      // SDK typically handles this automatically
      break;

    default:
      showMessage('Something went wrong.');
  }
}
Element validation events
The Payment Element emits change events as the shopper types. Use them to surface validation errors and to gate the submit button:
paymentElement.on('change', (event) => {
  const errorElement = document.getElementById('error-message');

  if (event.error) {
    errorElement.textContent = event.error.message;
  } else {
    errorElement.textContent = '';
  }

  // Enable/disable submit based on completeness
  const submitButton = document.getElementById('submit-button');
  submitButton.disabled = !event.complete;
});
Styling is applied through the appearance object you pass to hyper.elements(). Start from a theme preset, then override individual variables and rules.
Theme presets
| Theme | Description |
|---|---|
'default' | Clean, neutral styling |
'midnight' | Dark theme with blue accents |
'charcoal' | Dark grey theme |
'soft' | Light, subtle styling |
'brutal' | Bold, high-contrast |
'bubblegum' | Playful, colourful |
'none' | No base theme, fully custom |
const elements = hyper.elements({
  clientSecret,
  appearance: {
    theme: 'default', // Base theme
  },
});
Complete appearance variables
const appearance = {
  theme: 'default',

  // Label position: 'above' | 'floating' | 'never'
  labels: 'above',

  // Inner layout: 'spaced' | 'compressed'
  innerLayout: 'spaced',

  variables: {
    // ========== COLORS ==========

    // Primary brand color (buttons, links, focus states)
    colorPrimary: '#0066FF',
    colorPrimaryText: '#ffffff',

    // Background colors
    colorBackground: '#ffffff',
    colorBackgroundText: '#1a1a1a',

    // Text colors
    colorText: '#1a1a1a',
    colorTextSecondary: '#6b7280',
    colorTextPlaceholder: '#9ca3af',

    // Status colors
    colorDanger: '#dc2626',
    colorDangerText: '#dc2626',
    colorSuccess: '#16a34a',
    colorSuccessText: '#16a34a',
    colorWarning: '#f59e0b',
    colorWarningText: '#f59e0b',

    // Border color
    borderColor: '#e5e7eb',

    // Card icon colors
    colorIconCardCvc: '#6b7280',
    colorIconCardCvcError: '#dc2626',
    colorIconCardError: '#dc2626',

    // ========== TYPOGRAPHY ==========

    fontFamily: 'system-ui, -apple-system, sans-serif',

    // Font sizes
    fontSizeBase: '14px',
    fontSizeSm: '12px',
    fontSizeLg: '16px',
    fontSizeXl: '18px',
    fontSizeXs: '11px',
    fontSize2Xs: '10px',
    fontSize3Xs: '9px',

    // Font weights
    fontWeightLight: '300',
    fontWeightNormal: '400',
    fontWeightMedium: '500',
    fontWeightBold: '600',

    // Line height
    fontLineHeight: '1.5',

    // Advanced typography
    fontVariantLigatures: 'normal',
    fontVariationSettings: 'normal',

    // ========== SPACING ==========

    spacingUnit: '4px',
    spacingTab: '12px',
    spacingGridColumn: '16px',
    spacingGridRow: '16px',
    spacingAccordionItem: '12px',

    // ========== BORDERS ==========

    borderRadius: '8px',

    // ========== BUTTON CUSTOMISATION ==========

    buttonBackgroundColor: '#0066FF',
    buttonTextColor: '#ffffff',
    buttonBorderColor: '#0066FF',
    buttonBorderRadius: '8px',
    buttonBorderWidth: '0px',
    buttonHeight: '44px',
    buttonWidth: '100%',
    buttonTextFontSize: '16px',
    buttonTextFontWeight: '500',

    // ========== OTHER ==========

    // Disabled field styling
    disabledFieldColor: '#f3f4f6',
  },

  // CSS Rules for element-level styling
  rules: {
    // Input fields
    '.Input': {
      border: '1px solid #e5e7eb',
      borderRadius: '8px',
      padding: '12px',
      fontSize: '16px',
      transition: 'border-color 0.2s, box-shadow 0.2s',
    },
    '.Input:hover': {
      borderColor: '#d1d5db',
    },
    '.Input:focus': {
      borderColor: '#0066FF',
      boxShadow: '0 0 0 2px rgba(0, 102, 255, 0.2)',
      outline: 'none',
    },
    '.Input--invalid': {
      borderColor: '#dc2626',
    },
    '.Input--invalid:focus': {
      boxShadow: '0 0 0 2px rgba(220, 38, 38, 0.2)',
    },
    '.Input::placeholder': {
      color: '#9ca3af',
    },

    // Labels
    '.Label': {
      fontWeight: '500',
      fontSize: '14px',
      marginBottom: '8px',
      color: '#374151',
    },

    // Tabs
    '.Tab': {
      border: '1px solid #e5e7eb',
      borderRadius: '8px',
      padding: '12px 16px',
      backgroundColor: '#ffffff',
      transition: 'all 0.2s',
    },
    '.Tab:hover': {
      borderColor: '#d1d5db',
    },
    '.Tab--selected': {
      backgroundColor: '#0066FF',
      borderColor: '#0066FF',
      color: '#ffffff',
    },
    '.Tab--selected:hover': {
      backgroundColor: '#0052cc',
    },

    // Tab icons
    '.TabIcon': {
      fill: '#6b7280',
    },
    '.TabIcon--selected': {
      fill: '#ffffff',
    },

    // Accordion
    '.AccordionItem': {
      border: '1px solid #e5e7eb',
      borderRadius: '8px',
    },
    '.AccordionItemHeader': {
      padding: '16px',
    },
    '.AccordionItemHeader--selected': {
      backgroundColor: '#f9fafb',
    },

    // Error messages
    '.Error': {
      color: '#dc2626',
      fontSize: '14px',
      marginTop: '4px',
    },

    // Checkbox
    '.Checkbox': {
      accentColor: '#0066FF',
    },

    // Block (payment method container)
    '.Block': {
      backgroundColor: '#ffffff',
      borderRadius: '8px',
    },
  },
};
Dark mode
Build a second appearance object and pick between them based on the shopper's system preference:
const darkAppearance = {
  theme: 'midnight', // or 'charcoal'
  variables: {
    colorPrimary: '#4da3ff',
    colorBackground: '#1a1a1a',
    colorBackgroundText: '#ffffff',
    colorText: '#ffffff',
    colorTextSecondary: '#a1a1aa',
    colorTextPlaceholder: '#71717a',
    borderColor: '#3f3f46',
    buttonBackgroundColor: '#4da3ff',
    buttonTextColor: '#ffffff',
  },
  rules: {
    '.Input': {
      backgroundColor: '#27272a',
      borderColor: '#3f3f46',
      color: '#ffffff',
    },
    '.Tab': {
      backgroundColor: '#27272a',
      borderColor: '#3f3f46',
      color: '#ffffff',
    },
    '.Tab--selected': {
      backgroundColor: '#4da3ff',
    },
  },
};

// Auto-detect and apply theme
const prefersDark = window.matchMedia('(prefers-color-scheme: dark)').matches;
const elements = hyper.elements({
  clientSecret,
  appearance: prefersDark ? darkAppearance : appearance,
});
Layout configuration
Tabs layout is the default:
const paymentElement = elements.create('payment', {
  layout: 'tabs',
});
Accordion layout with the full set of options:
const paymentElement = elements.create('payment', {
  layout: {
    type: 'accordion', // 'tabs' | 'accordion'
    defaultCollapsed: false, // First item expanded
    radios: true, // Show radio buttons
    spacedAccordionItems: true, // Spacing between items
    maxAccordionItems: 4, // Max visible before scroll
  },
});
Tabs can also be arranged in a grid:
const paymentElement = elements.create('payment', {
  layout: {
    type: 'tabs',
    paymentMethodsArrangementForTabs: 'grid', // 'default' | 'grid'
  },
});
Custom fonts
Load fonts either from an external stylesheet or from your own font file, then reference the family in appearance.variables:
const elements = hyper.elements({
  clientSecret,
  fonts: [
    // Option 1: External CSS
    {
      cssSrc: 'https://fonts.googleapis.com/css2?family=Inter:wght@400;500;600',
    },

    // Option 2: Custom font file
    {
      family: 'CustomFont',
      src: 'url(https://yoursite.com/fonts/custom.woff2)',
      weight: '400',
    },
  ],
  appearance: {
    variables: {
      fontFamily: 'Inter, sans-serif',
    },
  },
});
Elements options
const elements = hyper.elements({
  // Required
  clientSecret: 'pi_xxx_secret_xxx',

  // Appearance (see above)
  appearance: appearance,

  // Locale: 'auto' or ISO code
  // Supported: en, he, fr, ar, ja, de, es, ca, pt, it, pl, nl, sv, ru, zh
  locale: 'auto',

  // Custom fonts
  fonts: [],

  // Loader behaviour: 'auto' | 'always' | 'never'
  loader: 'auto',
});
Test against the sandbox with test keys and the test cards below, then switch keys for production.
Sandbox versus production
Always use a pk_test_xxx key during development, and switch to pk_live_xxx only for production:
const publishableKey =
  process.env.NODE_ENV === 'production' ? 'pk_live_xxx' : 'pk_test_xxx';
Test card numbers
Successful payments:
| Card number | Brand | Result |
|---|---|---|
| 4242 4242 4242 4242 | Visa | Success |
| 5555 5555 5555 4444 | Mastercard | Success |
| 3782 822463 10005 | Amex | Success |
3-D Secure authentication:
| Card number | Brand | Result |
|---|---|---|
| 4000 0025 0000 3155 | Visa | 3DS required |
| 4000 0027 6000 3184 | Visa | 3DS required |
Declined cards:
| Card number | Brand | Result |
|---|---|---|
| 4000 0000 0000 0002 | Visa | Card declined |
| 4000 0000 0000 9995 | Visa | Insufficient funds |
| 4000 0000 0000 0069 | Visa | Expired card |
| 4000 0000 0000 0127 | Visa | Incorrect CVC |
| 4000 0000 0000 0119 | Visa | Processing error |
With any of these cards you can use any future expiry date (for example, 12/34), any 3-digit CVC (4-digit for Amex), and any postal code.
Browser developer tools
- Open the DevTools console to see SDK logs.
- Check the Network tab for API requests.
- Use the Application tab to inspect cookies and storage.
Automated testing
For end-to-end testing with Cypress or Playwright, drive the card fields inside the Element's iframe:
// cypress/e2e/checkout.cy.js
describe('Checkout', () => {
  it('completes payment successfully', () => {
    cy.visit('/checkout');

    // Wait for payment element to load
    cy.get('#payment-element iframe').should('be.visible');

    // Fill card details in iframe
    cy.getWithinIframe('[name="cardnumber"]').type('4242424242424242');
    cy.getWithinIframe('[name="exp-date"]').type('1234');
    cy.getWithinIframe('[name="cvc"]').type('123');

    // Submit payment
    cy.get('#submit-button').click();

    // Verify redirect to success page
    cy.url().should('include', '/payment-success');
  });
});
Debug logging
Enable verbose logging during development:
const hyper = Hyper('pk_test_xxx', {
  customBackendUrl: 'https://app.sandbox-next.peachpayments.com/api',
  // Logs detailed info to console
  debug: true,
});
Or log the payment flow yourself:
console.log('Creating payment intent...');
const { clientSecret } = await createPaymentIntent();
console.log('Client secret received:', clientSecret.substring(0, 20) + '...');

console.log('Confirming payment...');
const result = await hyper.confirmPayment({ elements, ... });
console.log('Payment result:', result);
The problems below account for most failed web integrations. If none of them match, see Getting help.
"Invalid API Key"
This is usually the wrong key, or a key from a different environment. Check, in order:
- You are using the publishable key (
pk_), not the secret key (sk_). - You are using the test key in sandbox and the live key in production.
- The key hasn't been rotated in the Dashboard.
if (!publishableKey.startsWith('pk_')) {
  throw new Error('Invalid key. Use publishable key (pk_), not secret key');
}
Payment Element not appearing
Check these in order.
The container exists and is visible:
const container = document.getElementById('payment-element');
if (!container) {
  console.error('Container element not found');
}
The client secret is valid:
if (!clientSecret || !clientSecret.startsWith('pi_')) {
  console.error('Invalid client secret');
}
Elements are created before mounting:
const elements = hyper.elements({ clientSecret });
const paymentElement = elements.create('payment');
paymentElement.mount('#payment-element');
CORS errors
Your server must send the right CORS headers. In Express.js:
app.use((req, res, next) => {
  res.header('Access-Control-Allow-Origin', 'https://yoursite.com');
  res.header('Access-Control-Allow-Methods', 'GET, POST, OPTIONS');
  res.header('Access-Control-Allow-Headers', 'Content-Type');
  next();
});
Content Security Policy blocking
Add the SDK host to your CSP header:
Content-Security-Policy: script-src 'self' https://app.sandbox-next.peachpayments.com; frame-src 'self' https://app.sandbox-next.peachpayments.com; connect-src 'self' https://app.sandbox-next.peachpayments.com;The iframe has its own CSP
The Payment Element renders in a sandboxed iframe, which may enforce its own
connect-src. If SDK requests are blocked because that connect-src does not
include your customBackendUrl host, your app's CSP cannot fix it — the
HyperLoader or sandbox-next SDK build must allow that backend host.
3DS authentication not working
- Ensure
return_urlis HTTPS in production. - Check that popup blockers aren't interfering.
- Verify the domain is on your allowed list.
const { error } = await hyper.confirmPayment({
  elements,
  confirmParams: {
    return_url: 'https://yoursite.com/complete', // Must be HTTPS
  },
});
Iframe not loading
Check the browser console for CSP violations, mixed content (HTTP on an HTTPS page), and JavaScript errors. Then make sure the page itself is served over HTTPS:
if (location.protocol !== 'https:' && location.hostname !== 'localhost') {
  console.warn('Payment elements require HTTPS');
}
Mobile keyboard covers the input
Add a viewport meta tag:
<meta
  name="viewport"
  content="width=device-width, initial-scale=1,
      maximum-scale=1, viewport-fit=cover"
/>
Styles not applying
CSS cannot style the contents of the iframe directly. Use the appearance API instead:
const elements = hyper.elements({
  clientSecret,
  appearance: {
    variables: {/* your styles */},
    rules: {/* CSS-like rules */},
  },
});
Getting help
Contact support for help. When reporting an issue, include:
- The SDK version.
- The browser and version.
- Error messages from the console.
- The Payment Intent ID (
pi_xxx). - Steps to reproduce.