Using Payment Links, Payment Page, payment extensions, Payouts, POS, or the Reconciliation API? View the classic product documentation
iOS Native SDK
Integrate the SDK into your iOS app using Swift
Minimum: iOS 15.1+
Prerequisites
Before you start integrating, make sure you have a suitable Xcode setup, Peach Orchestration credentials, a backend server that can create Payment Intents, and the Xcode capabilities the payment methods you plan to accept require.
Development environment
- Xcode 14.0 or later.
- An iOS 15.1+ deployment target.
- Swift 5.0 or later.
Peach Payments account
Don't have an account yet? Sign up first.
Already have an account? Collect your credentials from the Dashboard:
Log in to the Dashboard
You can log in to the Dashboard using one of the following methods:
- Using a magic link; this is the default login method. After entering your email address, Dashboard sends you a magic link that you click to log in.
- Using a password.
Info
Log in using a magic link
To access the Dashboard:
- Visit https://dashboard.peachpayments.com.
- Enter your company email address and click Submit.
- In your email inbox, click the Login to Dashboard link that you received from Peach Payments (if you've got multiple login emails, click the latest link). If the email isn't in your inbox, check your spam folder. The magic link expires after five minutes, but you can redo this procedure to receive a new link.
- When the Dashboard prompts you for two-factor authentication:
- On your phone, open your authenticator app and note the 6-digit authentication code for Peach Payments.
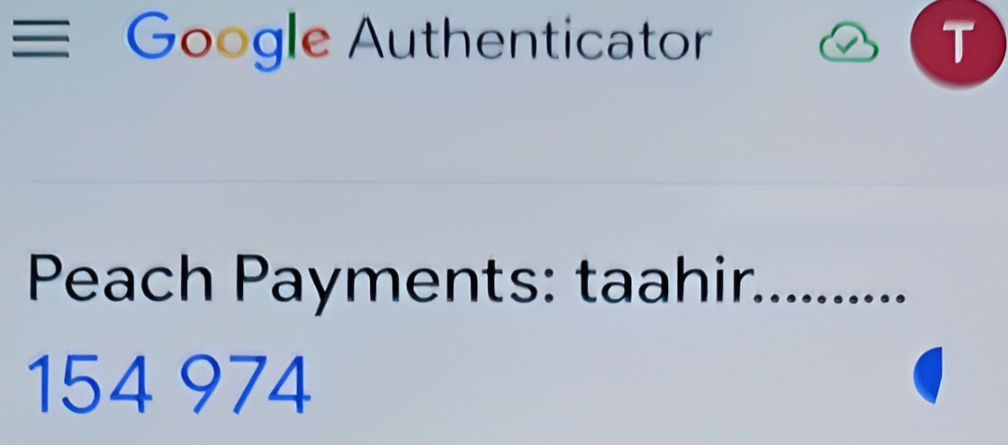
Example Google Authenticator authentication code. - In your browser, in the Verify Your Identity window, enter the authentication code.
- Select Remember this device for 30 days if you don't want the Dashboard to ask for an authentication code for the next 30 days.
- Click Continue.
- On your phone, open your authenticator app and note the 6-digit authentication code for Peach Payments.
Warning
Log in using a password
When you first gain access to the Dashboard, the email contains a link to either log in using a magic link, or to complete your account by setting a password. Use the password that you set there for all future logins, unless you reset it. If you can't find the initial email, you can set your first password using the reset your password functionality.
To access the Dashboard:
- Visit https://dashboard.peachpayments.com.
- Click Username & Password beneath the Submit button.
- Enter your company email address and password, and click Log in.
- When the Dashboard prompts you for two-factor authentication:
- On your phone, open your authenticator app and note the 6-digit authentication code for Peach Payments.
- In your browser, in the Verify Your Identity window, enter the authentication code.
- Select Remember this device for 30 days if you don't want the Dashboard to ask for an authentication code for the next 30 days.
- Click Continue.
- In the left sidebar, click Peach Orchestration.
- Under Peach Orchestration credentials, copy your profile ID (
pro_xxx) and publishable key (pk_snd_xxxfor sandbox,pk_prd_xxxfor live). The publishable key is safe to use in client-side code. - Under API keys, click New API key + to create a merchant API key (
snd_xxxfor sandbox,prd_xxxfor live).
Never ship your merchant API key
The merchant API key belongs on your server only. Never expose it in client-side code — a web page, a mobile app bundle, or anything else a shopper can read.
Can't find these credentials, or don't see the Peach Orchestration section? Contact support to request access.
Backend server
You need a server to create Payment Intents.
Never expose your secret key
Your secret key belongs on your server only. Never put it in the iOS app — anything shipped in an app bundle can be read.
Required capabilities in Xcode
- If you are using Apple Pay, add the Apple Pay capability.
- If you are using the in-app browser, no additional capabilities are needed.
Wallet prerequisites
Apple Pay
For app integrations you provide your own Apple Pay certificates, which requires Apple Developer Program membership. Peach Payments provides the certificate signing requests (CSRs) — contact support to request them.
- Register a merchant ID in the Apple Developer portal under Certificates, Identifiers & Profiles > Identifiers > Merchant IDs, using the format
merchant.com.yourcompany. Go to Merchant IDs. - Create a payment processing certificate against that merchant ID.
- In Xcode, go to Signing & Capabilities > + Capability > Apple Pay and tick your registered merchant IDs.
- Send Peach Payments your Apple Pay merchant ID and certificates so they can configure your account.
Apple's own references: Setting up your server and the Apple Pay implementation guide.
The iOS SDK is distributed as CocoaPods pods from a private spec repo. Add both sources to your Podfile, install, and import the module in your Swift files.
Current version
iOS pods are at 0.7.4. Release assets are published on the GitHub tag v0.7.4.
CocoaPods
Two sources are required
The pods live on a private spec repo, not on CocoaPods trunk. Add both the Peach specs, for the SDK itself, and the CocoaPods CDN, for its transitive dependencies.
In your Podfile:
source 'https://github.com/peach-payments/hyperswitch-sdk-ios.git'
source 'https://cdn.cocoapods.org/'

platform :ios, '15.1'
use_frameworks!

target 'YourApp' do
  pod 'peachpayments-hyperswitch-ios', '~> 0.7.4'
end
Then run:
pod repo update && pod installThe three pods
All three are at 0.7.4.
| Pod | Swift module |
|---|---|
peachpayments-hyperswitch-ios | Hyperswitch |
peachpayments-hyperswitch-ios-lite | HyperswitchLite |
peachpayments-hyperswitch-ios-authentication | HyperswitchAuthentication |
Subspecs on the main pod
| Subspec | What it adds |
|---|---|
core | Default, you get it without asking. |
common | Default, you get it without asking. |
sentry | Crash and error reporting. |
scancard | Card scanning. |
netcetera3ds | Netcetera 3-D Secure. |
airborne | Over-the-air updates. |
paypal | PayPal. |
Request one explicitly like this:
pod 'peachpayments-hyperswitch-ios/scancard'The Flutter plugin depends on peachpayments-hyperswitch-ios/sentry.
Post-installation
Import the module in your Swift files:
import HyperswitchTest mode
Use your sandbox publishable key (pk_snd_...) during development, and switch
to the live key (pk_prd_...) when you go live.
Create a PaymentSession instance with your publishable key and store it as a property so you can use it later.
Basic initialisation
import Hyperswitch

class CheckoutManager {
    let paymentSession: PaymentSession

    init() {
        paymentSession = PaymentSession(
            publishableKey: "pk_test_your_publishable_key",
            customBackendUrl: "https://app.sandbox-next.peachpayments.com/api"
        )
    }
}
For SwiftUI apps:
@main
struct YourApp: App {
    let paymentSession = PaymentSession(
        publishableKey: "pk_test_your_publishable_key",
        customBackendUrl: "https://app.sandbox-next.peachpayments.com/api"
    )

    var body: some Scene {
        WindowGroup {
            ContentView()
                .environmentObject(paymentSession)
        }
    }
}
Environment-based configuration
enum Environment {
    case sandbox
    case production

    var publishableKey: String {
        switch self {
        case .sandbox:
            return "pk_test_xxx"
        case .production:
            return "pk_live_xxx"
        }
    }

    var apiUrl: String {
        switch self {
        case .sandbox:
            return "https://app.sandbox-next.peachpayments.com/api"
        case .production:
            return "https://app.next.peachpayments.com/api"
        }
    }
}

// Use based on build configuration
#if DEBUG
let environment = Environment.sandbox
#else
let environment = Environment.production
#endif

let paymentSession = PaymentSession(
    publishableKey: environment.publishableKey,
    customBackendUrl: environment.apiUrl
)
A basic integration is four steps: create a PaymentSession, create a Payment Intent on your server, initialise and present the payment sheet, then handle the result. The snippets below are all parts of the same CheckoutViewController.
import Hyperswitch
import UIKit

class CheckoutViewController: UIViewController {

    private var paymentSession: PaymentSession!
Step 1: Create a PaymentSession
Create the session with your publishable key.
override func viewDidLoad() {
        super.viewDidLoad()

        // Step 1: Create a PaymentSession with your publishable key
        paymentSession = PaymentSession(
            publishableKey: "pk_test_your_publishable_key",
            customBackendUrl: "https://app.sandbox-next.peachpayments.com/api"
        )
    }
Step 2: Create the Payment Intent server-side
Your backend should create the Payment Intent and return the client_secret.
func createPaymentIntent() async throws -> String {
        let url = URL(string: "https://your-server.com/create-payment-intent")!
        var request = URLRequest(url: url)
        request.httpMethod = "POST"
        request.setValue("application/json", forHTTPHeaderField: "Content-Type")

        let body: [String: Any] = [
            "amount": 6500,        // Amount in smallest currency unit (cents)
            "currency": "zar",     // ISO currency code
            "customer_id": "cus_xxx"  // Optional: for saved cards
        ]
        request.httpBody = try JSONSerialization.data(withJSONObject: body)

        let (data, _) = try await URLSession.shared.data(for: request)
        let response = try JSONDecoder().decode(PaymentIntentResponse.self, from: data)

        return response.clientSecret
    }

    struct PaymentIntentResponse: Codable {
        let clientSecret: String

        enum CodingKeys: String, CodingKey {
            case clientSecret = "client_secret"
        }
    }
Step 3: Initialise and present the payment sheet
Fetch the client secret, initialise the session with it, and present the sheet on the main thread.
@IBAction func payButtonTapped(_ sender: UIButton) {
        Task {
            await processPayment()
        }
    }

    func processPayment() async {
        do {
            showLoading(true)

            // Get client secret from your server
            let clientSecret = try await createPaymentIntent()

            // Initialise the payment session with the client secret
            paymentSession.initPaymentSession(paymentIntentClientSecret: clientSecret)

            // Present on main thread
            await MainActor.run {
                showLoading(false)
                presentPaymentSheet()
            }
        } catch {
            await MainActor.run {
                showLoading(false)
                showError(error)
            }
        }
    }

    func presentPaymentSheet() {
        let configuration = PaymentSheet.Configuration()

        paymentSession.presentPaymentSheet(
            viewController: self,
            configuration: configuration
        ) { [weak self] result in
            switch result {
            case .completed(let data):
                self?.handlePaymentSuccess()
            case .canceled(let data):
                self?.handlePaymentCanceled()
            case .failed(let error):
                self?.handlePaymentFailure(error)
            }
        }
    }
Step 4: Handle the results
func handlePaymentSuccess() {
        let alert = UIAlertController(
            title: "Payment Successful",
            message: "Thank you for your purchase!",
            preferredStyle: .alert
        )
        alert.addAction(UIAlertAction(title: "OK", style: .default) { _ in
            self.navigationController?.popToRootViewController(animated: true)
        })
        present(alert, animated: true)
    }

    func handlePaymentCanceled() {
        // User dismissed the payment sheet
        print("Payment canceled by user")
    }

    func handlePaymentFailure(_ error: Error) {
        let alert = UIAlertController(
            title: "Payment Failed",
            message: error.localizedDescription,
            preferredStyle: .alert
        )
        alert.addAction(UIAlertAction(title: "Try Again", style: .default))
        present(alert, animated: true)
    }
SwiftUI alternative
Use PaymentSheet.PaymentButton for SwiftUI:
PaymentSheet.PaymentButton(
    paymentSession: paymentSession,
    configuration: PaymentSheet.Configuration(),
    onCompletion: { result in ... }
) {
    Text("Pay Now")
}
Helpers
func showLoading(_ show: Bool) {
        // Implement your loading indicator
    }

    func showError(_ error: Error) {
        let alert = UIAlertController(
            title: "Error",
            message: error.localizedDescription,
            preferredStyle: .alert
        )
        alert.addAction(UIAlertAction(title: "OK", style: .default))
        present(alert, animated: true)
    }
}
The SDK automatically shows the available payment methods based on your Peach Payments Dashboard configuration, the customer's location, and the payment amount and currency.
Cards
Cards are enabled by default. The SDK handles:
- Card number validation.
- Expiry date validation.
- CVV/CVC validation.
- 3-D Secure authentication, automatically.
Supported card networks are Visa, Mastercard, American Express, and Diners Club.
Apple Pay
Mobile SDK V2 requires your own Apple Pay certificates for app review.
- Register a merchant ID (
merchant.com.yourcompany) in the Apple Developer portal. - Create a payment processing certificate. Peach Payments provides the CSRs — contact support to request them.
- Add the Apple Pay capability in Xcode and tick your merchant IDs.
- Send Peach Payments your merchant ID and certificates to configure your account.
var configuration = PaymentSheet.Configuration()
configuration.applePay = PaymentSheet.ApplePayConfiguration(
    merchantId: "merchant.com.yourcompany.app",
    merchantCountryCode: "ZA"
)
The Apple Pay button appears automatically if the device supports Apple Pay, the user has cards in Wallet, and your merchant ID is valid.
Google Pay for Catalyst and Mac apps
Google Pay is available on macOS Catalyst apps.
configuration.googlePay = PaymentSheet.GooglePayConfiguration(
    environment: .test,  // or .production
    merchantCountryCode: "ZA",
    merchantName: "Your Store"
)
Direct wallet buttons
ApplePayButton and ExpressCheckoutButton embed a real branded Apple Pay button in your own checkout, with no payment sheet in between. The customer taps it and completes the payment in Apple's own sheet.
Both buttons need the two-stage bootstrap: Hyperswitch(configuration:), then initPaymentSession(configuration:).
let button = ApplePayButton(
    paymentSession: paymentSession,
    configuration: configuration
) { result in
    switch result {
    case .completed(let data): break  // payment succeeded
    case .canceled(let data):  break  // customer dismissed the wallet sheet
    case .failed(let error):   break  // payment failed
    }
}

view.addSubview(button)
// Pin leading/trailing/top only - do NOT add a height constraint.
// The SDK reports the height the button needs.
ExpressCheckoutButton has identical initialisers and renders a row of every wallet you have enabled:
let expressRow = ExpressCheckoutButton(
    paymentSession: paymentSession,
    configuration: configuration
) { result in /* same result cases */ }The button may render nothing
The SDK decides availability: the wallet must be enabled for your merchant, the connector must return a session token, and the wallet must be usable on the device. When any of those fail the button collapses to zero height. That is a normal empty state, not an error — always keep a card fallback in your checkout.
Programmatic start
If you would rather drive the payment from your own button, call confirm() on the wallet button. Apple's guidelines expect the branded button to be the tap target, so prefer letting the customer tap it.
Testing Apple Pay
Testing needs a real device with a provisioned card, or a simulator signed into a sandbox tester account.
Bank redirects
Enable bank redirects in the Peach Payments Dashboard. Set returnURL so the customer can return to your app after the bank page:
configuration.returnURL = "yourapp://payment-return"Handle the return in your AppDelegate:
func application(
    _ app: UIApplication,
    open url: URL,
    options: [UIApplication.OpenURLOptionsKey: Any] = [:]
) -> Bool {
    let handled = PaymentSession.handleURLCallback(url)
    return handled
}
Buy now, pay later
Enable the BNPL methods you offer in the Peach Payments Dashboard. The SDK shows each one automatically when it is available for the amount and currency. Completing a BNPL payment typically redirects to the provider's app or website.
Payment method ordering
Control which payment methods appear first:
configuration.paymentMethodOrder = [
    "card",
    "apple_pay",
    "payjustnow",  // any enabled BNPL; also payflex, float, mobicred, …
]
Payment method filtering
You can filter payment methods on the server side when creating the Payment Intent. On your server, in Node.js:
const paymentIntent = await peachOrchestration.paymentIntents.create({
  amount: 6500,
  currency: 'zar',
  payment_method_types: ['card', 'apple_pay'], // Only these methods
});
To enable saved cards for returning customers you need to create a customer in Peach Orchestration, generate an Ephemeral Key for that customer, and pass the customer information to the SDK.
Step 1: Create the customer server-side
On your server:
POST /customers{ "email": "customer@example.com", "name": "John Doe", "phone": "+27123456789"}Returns: { "customer_id": "cus_xxx" }Step 2: Create an ephemeral key server-side
On your server:
POST /ephemeral_keys{ "customer_id": "cus_xxx"}Returns: { "secret": "ek_xxx" }Step 3: Configure the SDK with the customer
struct CheckoutData: Codable {
    let clientSecret: String
    let customerId: String
    let ephemeralKey: String

    enum CodingKeys: String, CodingKey {
        case clientSecret = "client_secret"
        case customerId = "customer_id"
        case ephemeralKey = "ephemeral_key"
    }
}

func setupPaymentSheet(checkoutData: CheckoutData) {
    var configuration = PaymentSheet.Configuration()
    configuration.merchantDisplayName = "Your Store"

    // Enable saved cards for this customer
    configuration.customer = PaymentSheet.CustomerConfiguration(
        id: checkoutData.customerId,
        ephemeralKeySecret: checkoutData.ephemeralKey
    )

    // Allow customers to save cards for future use
    configuration.savePaymentMethodOptIn = .requiresOptIn  // Shows checkbox
    // Other options:
    // .requiresOptOut - Checked by default
    // .userSelectable - Let user choose

    paymentSheet = PaymentSheet(
        paymentIntentClientSecret: checkoutData.clientSecret,
        configuration: configuration
    )
}
Displaying saved payment methods
Saved cards appear automatically at the top of the payment sheet. The customer can select a saved card, add a new card, or remove saved cards if that is enabled.
Setup Intents: saving a card without a payment
Use Setup Intents to save a card without charging it.
func saveCardWithoutPayment(customerId: String) async throws {
    // Server creates a Setup Intent
    let setupIntent = try await createSetupIntent(customerId: customerId)

    var configuration = PaymentSheet.Configuration()
    configuration.merchantDisplayName = "Your Store"
    configuration.customer = PaymentSheet.CustomerConfiguration(
        id: customerId,
        ephemeralKeySecret: setupIntent.ephemeralKey
    )

    // Use setupIntentClientSecret instead of paymentIntentClientSecret
    let paymentSheet = PaymentSheet(
        setupIntentClientSecret: setupIntent.clientSecret,
        configuration: configuration
    )

    // Present to collect and save card
    paymentSheet.present(from: self) { result in
        switch result {
        case .completed:
            print("Card saved successfully!")
        case .canceled:
            print("User canceled")
        case .failed(let error):
            print("Failed to save card: \(error)")
        }
    }
}
Charging a saved card server-side
Once a card is saved, charge it from your server:
POST /payments{ "amount": 6500, "currency": "zar", "customer_id": "cus_xxx", "payment_method": "pm_xxx", // Saved payment method ID "off_session": true, // Customer not present "confirm": true}Listing saved payment methods
func listSavedCards(customerId: String) async throws -> [SavedCard] {
    let url = URL(string: "https://your-server.com/customers/\(customerId)/payment-methods")!
    let (data, _) = try await URLSession.shared.data(from: url)
    return try JSONDecoder().decode([SavedCard].self, from: data)
}

struct SavedCard: Codable {
    let id: String
    let card: CardDetails

    struct CardDetails: Codable {
        let brand: String      // "visa", "mastercard", and so on
        let last4: String      // "4242"
        let expMonth: Int
        let expYear: Int
    }
}
Handle the payment sheet result, map card error codes to messages your shoppers can act on, and treat network failures separately from payment failures.
import HyperswitchPayment sheet result handling
A cancellation is not an error — the customer dismissed the sheet.
func handlePaymentResult(_ result: PaymentSheetResult) {
    switch result {
    case .completed(let data):
        // Payment successful
        handleSuccess()

    case .canceled(let data):
        // User dismissed - not an error
        handleCancellation()

    case .failed(let error):
        // Actual error occurred
        handleError(error)
    }
}
Error types
func handleError(_ error: Error) {
    // The error from PaymentSheetResult.failed
    // contains the localized description of what went wrong
    showGenericError(error)
}
Card error codes
func handleCardError(code: String, message: String) {
    let userMessage: String

    switch code {
    case "card_declined":
        userMessage = "Your card was declined. Please try another card."

    case "expired_card":
        userMessage = "Your card has expired. Please use a different card."

    case "incorrect_cvc":
        userMessage = "The security code is incorrect. Please check and try again."

    case "insufficient_funds":
        userMessage = "Insufficient funds. Please try another card."

    case "processing_error":
        userMessage = "An error occurred while processing. Please try again."

    case "incorrect_number":
        userMessage = "The card number is incorrect. Please check and try again."

    case "invalid_expiry_month", "invalid_expiry_year":
        userMessage = "The expiration date is invalid."

    case "card_not_supported":
        userMessage = "This card is not supported. Please try another card."

    case "currency_not_supported":
        userMessage = "This card doesn't support the requested currency."

    case "duplicate_transaction":
        userMessage = "A similar transaction was just processed. Please wait."

    case "fraudulent":
        userMessage = "This transaction cannot be processed."

    default:
        userMessage = message  // Use server message as fallback
    }

    showAlert(title: "Card Error", message: userMessage)
}
Network error handling
func showNetworkError(_ error: Error) {
    let nsError = error as NSError

    if nsError.domain == NSURLErrorDomain {
        switch nsError.code {
        case NSURLErrorNotConnectedToInternet:
            showAlert(
                title: "No Internet Connection",
                message: "Please check your connection and try again."
            )

        case NSURLErrorTimedOut:
            showAlert(
                title: "Request Timed Out",
                message: "The request took too long. Please try again."
            )

        case NSURLErrorNetworkConnectionLost:
            showAlert(
                title: "Connection Lost",
                message: "Your connection was interrupted. Please try again."
            )

        default:
            showAlert(
                title: "Network Error",
                message: "Unable to connect. Please try again."
            )
        }
    }
}
Retry logic
Only retry network errors, and back off between attempts.
class PaymentRetryManager {
    private var retryCount = 0
    private let maxRetries = 3

    func attemptPayment(action: @escaping () async throws -> Void) async {
        do {
            try await action()
            retryCount = 0  // Reset on success
        } catch {
            if shouldRetry(error: error) && retryCount < maxRetries {
                retryCount += 1
                let delay = Double(retryCount) * 2  // Exponential backoff
                try? await Task.sleep(nanoseconds: UInt64(delay * 1_000_000_000))
                await attemptPayment(action: action)
            } else {
                throw error
            }
        }
    }

    private func shouldRetry(error: Error) -> Bool {
        // Only retry on network errors
        let nsError = error as NSError
        return nsError.domain == NSURLErrorDomain
    }
}
Logging for debugging
#if DEBUG
func logPaymentError(_ error: Error) {
    print("=== Payment Error ===")
    print("Type: \(type(of: error))")
    print("Description: \(error.localizedDescription)")

    print("Error details: \(error)")

    print("====================")
}
#endif
Build a PaymentSheet.Appearance to match the payment sheet to your brand, then pass it to your sheet configuration.
import Hyperswitch
import UIKit
Building an appearance
func createAppearance() -> PaymentSheet.Appearance {
    var appearance = PaymentSheet.Appearance()

    // COLORS
    // ---------------------------------------------
    appearance.colors.primary = UIColor(hex: "#0066FF")!
    appearance.colors.background = .systemBackground
    appearance.colors.componentBackground = .secondarySystemBackground
    appearance.colors.componentBorder = .separator
    appearance.colors.componentDivider = .separator
    appearance.colors.text = .label
    appearance.colors.textSecondary = .secondaryLabel
    appearance.colors.placeholderText = .placeholderText
    appearance.colors.icon = .secondaryLabel
    appearance.colors.danger = .systemRed


    // CORNER RADIUS
    // ---------------------------------------------
    appearance.cornerRadius = 12  // Default is 6


    // BORDER WIDTH
    // ---------------------------------------------
    appearance.borderWidth = 1  // Default is 1


    // SHADOW
    // ---------------------------------------------
    appearance.shadow = PaymentSheet.Appearance.Shadow(
        color: .black,
        opacity: 0.15,
        offset: CGSize(width: 0, height: 2),
        radius: 4
    )


    // FONT
    // ---------------------------------------------
    appearance.font.base = UIFont.systemFont(ofSize: 14, weight: .regular)
    appearance.font.sizeScaleFactor = 1.0  // Scale all fonts

    // Custom font family
    appearance.font.base = UIFont(name: "Avenir-Medium", size: 14) ?? .systemFont(ofSize: 14)


    // PRIMARY BUTTON
    // ---------------------------------------------
    appearance.primaryButton.backgroundColor = UIColor(hex: "#0066FF")
    appearance.primaryButton.textColor = .white
    appearance.primaryButton.cornerRadius = 8
    appearance.primaryButton.borderWidth = 0
    appearance.primaryButton.font = UIFont.systemFont(ofSize: 16, weight: .semibold)
    appearance.primaryButton.shadow = PaymentSheet.Appearance.Shadow(
        color: UIColor(hex: "#0066FF")!,
        opacity: 0.3,
        offset: CGSize(width: 0, height: 4),
        radius: 8
    )

    return appearance
}
Theme presets
extension PaymentSheet.Appearance {

    static var light: PaymentSheet.Appearance {
        var appearance = PaymentSheet.Appearance()
        appearance.colors.primary = UIColor(hex: "#0066FF")!
        appearance.colors.background = .white
        appearance.colors.componentBackground = UIColor(hex: "#F5F5F5")!
        appearance.colors.text = UIColor(hex: "#1A1A1A")!
        appearance.cornerRadius = 8
        return appearance
    }

    static var dark: PaymentSheet.Appearance {
        var appearance = PaymentSheet.Appearance()
        appearance.colors.primary = UIColor(hex: "#4DA3FF")!
        appearance.colors.background = UIColor(hex: "#1A1A1A")!
        appearance.colors.componentBackground = UIColor(hex: "#2D2D2D")!
        appearance.colors.text = .white
        appearance.cornerRadius = 8
        return appearance
    }

    static var minimal: PaymentSheet.Appearance {
        var appearance = PaymentSheet.Appearance()
        appearance.colors.primary = .black
        appearance.cornerRadius = 0
        appearance.borderWidth = 0
        appearance.shadow = PaymentSheet.Appearance.Shadow(
            color: .clear, opacity: 0, offset: .zero, radius: 0
        )
        return appearance
    }

    static var branded: PaymentSheet.Appearance {
        var appearance = PaymentSheet.Appearance()
        // Use your brand colors
        appearance.colors.primary = UIColor(hex: "#FF6B00")!  // Orange
        appearance.font.base = UIFont(name: "YourBrandFont", size: 14) ?? .systemFont(ofSize: 14)
        appearance.cornerRadius = 16
        return appearance
    }
}
Dark mode support
func getAppearanceForCurrentMode() -> PaymentSheet.Appearance {
    if UITraitCollection.current.userInterfaceStyle == .dark {
        return .dark
    } else {
        return .light
    }
}
In your view controller:
override func traitCollectionDidChange(_ previousTraitCollection: UITraitCollection?) {
    super.traitCollectionDidChange(previousTraitCollection)

    if traitCollection.hasDifferentColorAppearance(comparedTo: previousTraitCollection) {
        // Recreate payment sheet with new appearance
        reconfigurePaymentSheet()
    }
}
Helper: UIColor from hex
extension UIColor {
    convenience init?(hex: String) {
        var hexSanitized = hex.trimmingCharacters(in: .whitespacesAndNewlines)
        hexSanitized = hexSanitized.replacingOccurrences(of: "#", with: "")

        var rgb: UInt64 = 0
        Scanner(string: hexSanitized).scanHexInt64(&rgb)

        let r = CGFloat((rgb & 0xFF0000) >> 16) / 255.0
        let g = CGFloat((rgb & 0x00FF00) >> 8) / 255.0
        let b = CGFloat(rgb & 0x0000FF) / 255.0

        self.init(red: r, green: g, blue: b, alpha: 1.0)
    }
}
Test against the sandbox with the test cards below, then cover your checkout with unit and UI tests before going live.
Sandbox versus production
Always use the sandbox key (pk_test_xxx) during development, and switch to production (pk_live_xxx) only for live transactions.
#if DEBUG
let publishableKey = "pk_test_xxx"
#else
let publishableKey = "pk_live_xxx"
#endif
Test card numbers
Use these card numbers in sandbox mode.
Successful payments:
| Card number | Brand | Result |
|---|---|---|
| 4242424242424242 | Visa | Success |
| 5555555555554444 | Mastercard | Success |
| 378282246310005 | Amex | Success |
Authentication required (3DS):
| Card number | Brand | Result |
|---|---|---|
| 4000002500003155 | Visa | 3DS Required |
| 4000002760003184 | Visa | 3DS Required |
Declined cards:
| Card number | Brand | Result |
|---|---|---|
| 4000000000000002 | Visa | Card Declined |
| 4000000000009995 | Visa | Insufficient Funds |
| 4000000000000069 | Visa | Expired Card |
| 4000000000000127 | Visa | Incorrect CVC |
| 4000000000000119 | Visa | Processing Error |
Any valid future expiry date works, for example 12/34. Any 3-digit CVC works, or 4-digit for Amex. Any 5-digit ZIP code works.
Unit testing payment flows
import XCTest
@testable import YourApp

class PaymentTests: XCTestCase {

    func testPaymentIntentCreation() async throws {
        let viewModel = CheckoutViewModel()

        let clientSecret = try await viewModel.createPaymentIntent(
            amount: 6500,
            currency: "zar"
        )

        XCTAssertFalse(clientSecret.isEmpty)
        XCTAssertTrue(clientSecret.starts(with: "pi_"))
    }

    func testPaymentConfiguration() {
        let config = PaymentSheet.Configuration()
        config.merchantDisplayName = "Test Store"

        XCTAssertEqual(config.merchantDisplayName, "Test Store")
    }
}
UI testing
import XCTest

class PaymentUITests: XCTestCase {

    func testPaymentSheetPresentation() {
        let app = XCUIApplication()
        app.launch()

        // Navigate to checkout
        app.buttons["Checkout"].tap()

        // Tap pay button
        app.buttons["Pay Now"].tap()

        // Wait for payment sheet to appear
        let paymentSheet = app.otherElements["PaymentSheet"]
        XCTAssertTrue(paymentSheet.waitForExistence(timeout: 5))

        // Verify card input field exists
        let cardField = app.textFields["Card number"]
        XCTAssertTrue(cardField.exists)
    }

    func testSuccessfulPayment() {
        let app = XCUIApplication()
        app.launch()

        app.buttons["Checkout"].tap()
        app.buttons["Pay Now"].tap()

        // Enter test card details
        let cardField = app.textFields["Card number"]
        cardField.tap()
        cardField.typeText("4242424242424242")

        app.textFields["MM / YY"].typeText("1234")
        app.textFields["CVC"].typeText("123")
        app.textFields["ZIP"].typeText("12345")

        // Submit payment
        app.buttons["Pay"].tap()

        // Verify success
        let successAlert = app.alerts["Payment Successful"]
        XCTAssertTrue(successAlert.waitForExistence(timeout: 10))
    }
}
Debugging tips
-
Enable verbose logging in debug builds.
PaymentSessionsupports verbose logging in debug builds.swift#if DEBUG // PaymentSession supports verbose logging in debug builds #endif -
Check API responses.
swiftfunc debugPaymentIntent(clientSecret: String) { print("Client Secret: \(clientSecret)") print("Payment Intent ID: \(clientSecret.components(separatedBy: "_secret_").first ?? "unknown")") } -
Verify webhook delivery.
-
Use Charles Proxy or similar to inspect network traffic.
-
Check for common issues:
- Wrong API key, test versus live.
- Missing return URL for redirects.
- Customer ID mismatch.
- Currency not supported by the payment method.
Common issues and their solutions, and what to include when you ask Peach Payments for help.
Invalid API key
The cause is using the wrong key, or a key from a different environment.
- Verify you're using the publishable key (
pk_), not the secret key (sk_). - Check you're using the test key in sandbox and the live key in production.
- Verify the key hasn't been rotated in the Dashboard.
func validateAPIKey() {
    let key = "pk_test_xxx"
    guard key.starts(with: "pk_") else {
        fatalError("Invalid key format. Use publishable key (pk_), not secret key (sk_)")
    }
}
Payment sheet doesn't appear
There are three likely causes.
The first is not being on the main thread:
await MainActor.run {
    paymentSheet?.present(from: self) { result in }
}
The second is the view controller not being in the hierarchy:
guard self.view.window != nil else {
    print("Error: View controller not in window hierarchy")
    return
}
The third is an invalid or expired client secret. Client secrets expire after 24 hours — create a new one.
3DS authentication failing
-
Ensure the return URL is configured.
swiftconfiguration.returnURL = "yourapp://payment-return" -
Handle the URL callback in your
AppDelegate.swiftfunc application(_ app: UIApplication, open url: URL, options: [UIApplication.OpenURLOptionsKey: Any]) -> Bool { return PaymentSession.handleURLCallback(url) } -
Add the URL scheme to
Info.plist.xml<key>CFBundleURLTypes</key> <array> <dict> <key>CFBundleURLSchemes</key> <array> <string>yourapp</string> </array> </dict> </array>
Apple Pay not showing
Work through this checklist:
- The Apple Pay capability is added in Xcode.
- Peach Payments must have configured your account with the merchant ID and certificates that you sent.
- Apple Pay is enabled for your Peach Payments account.
- You are testing on a real device, not the simulator.
- Cards are added to the Wallet app.
Debug Apple Pay availability:
import PassKit

func checkApplePayAvailability() {
    if PKPaymentAuthorizationController.canMakePayments() {
        print("Apple Pay is available")

        if PKPaymentAuthorizationController.canMakePayments(usingNetworks: [.visa, .masterCard]) {
            print("User has cards that can pay")
        } else {
            print("User needs to add cards to Wallet")
        }
    } else {
        print("Apple Pay is NOT available on this device")
    }
}
Wallet button renders nothing
ApplePayButton and ExpressCheckoutButton collapse to zero height when the SDK decides the wallet is unavailable. Check that:
- The wallet is enabled for your merchant account.
- The connector returned a session token for this payment.
- The wallet is usable on this device — a real device, with a card in Wallet.
A collapsed wallet button is a normal empty state
This is not an error. Keep a card fallback visible in your checkout.
Saved cards not appearing
- Verify the customer ID matches.
- Check the ephemeral key is fresh — they expire quickly.
- Ensure the customer has saved cards in Peach Orchestration.
func debugSavedCards(customerId: String) async {
    do {
        let cards = try await fetchSavedCards(customerId: customerId)
        print("Found \(cards.count) saved cards")
        cards.forEach { print("- \($0.card.brand) ****\($0.card.last4)") }
    } catch {
        print("Failed to fetch cards: \(error)")
    }
}
Network request failed
-
Check your App Transport Security settings. Add this to
Info.plistif you are using a custom domain:xml<key>NSAppTransportSecurity</key> <dict> <key>NSAllowsArbitraryLoads</key> <false/> <key>NSExceptionDomains</key> <dict> <key>your-domain.com</key> <dict> <key>NSExceptionAllowsInsecureHTTPLoads</key> <false/> <key>NSExceptionRequiresForwardSecrecy</key> <true/> </dict> </dict> </dict> -
Check network connectivity.
swiftimport Network let monitor = NWPathMonitor() monitor.pathUpdateHandler = { path in if path.status == .satisfied { print("Network available") } else { print("No network connection") } } monitor.start(queue: .global())
Getting help
Contact support for help.
When reporting issues, include:
- SDK version.
- iOS version.
- Xcode version.
- Steps to reproduce.
- Error messages and logs.
- Payment Intent ID, if applicable.