Using Payment Links, Payment Page, payment extensions, Payouts, POS, or the Reconciliation API? View the classic product documentation
React Native SDK
Integrate Peach Orchestration SDK into your React Native app
Minimum: React Native 0.70+
Prerequisites
Before you start integrating, make sure you have a working React Native toolchain for both platforms, Peach Orchestration credentials, and a backend server that can create Payment Intents.
Development environment
- React Native 0.70 or later.
- Node.js 16 or later.
- For iOS: Xcode 14 or later, and CocoaPods.
- For Android: Android Studio, and JDK 11 or later.
Peach Payments account
Don't have an account yet? Sign up first.
Already have an account? Collect your credentials from the Dashboard:
Log in to the Dashboard
You can log in to the Dashboard using one of the following methods:
- Using a magic link; this is the default login method. After entering your email address, Dashboard sends you a magic link that you click to log in.
- Using a password.
Info
Log in using a magic link
To access the Dashboard:
- Visit https://dashboard.peachpayments.com.
- Enter your company email address and click Submit.
- In your email inbox, click the Login to Dashboard link that you received from Peach Payments (if you've got multiple login emails, click the latest link). If the email isn't in your inbox, check your spam folder. The magic link expires after five minutes, but you can redo this procedure to receive a new link.
- When the Dashboard prompts you for two-factor authentication:
- On your phone, open your authenticator app and note the 6-digit authentication code for Peach Payments.
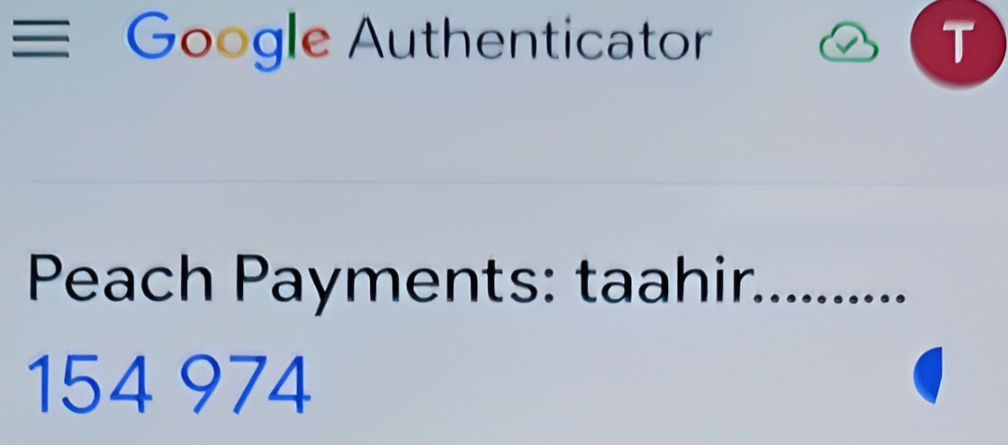
Example Google Authenticator authentication code. - In your browser, in the Verify Your Identity window, enter the authentication code.
- Select Remember this device for 30 days if you don't want the Dashboard to ask for an authentication code for the next 30 days.
- Click Continue.
- On your phone, open your authenticator app and note the 6-digit authentication code for Peach Payments.
Warning
Log in using a password
When you first gain access to the Dashboard, the email contains a link to either log in using a magic link, or to complete your account by setting a password. Use the password that you set there for all future logins, unless you reset it. If you can't find the initial email, you can set your first password using the reset your password functionality.
To access the Dashboard:
- Visit https://dashboard.peachpayments.com.
- Click Username & Password beneath the Submit button.
- Enter your company email address and password, and click Log in.
- When the Dashboard prompts you for two-factor authentication:
- On your phone, open your authenticator app and note the 6-digit authentication code for Peach Payments.
- In your browser, in the Verify Your Identity window, enter the authentication code.
- Select Remember this device for 30 days if you don't want the Dashboard to ask for an authentication code for the next 30 days.
- Click Continue.
- In the left sidebar, click Peach Orchestration.
- Under Peach Orchestration credentials, copy your profile ID (
pro_xxx) and publishable key (pk_snd_xxxfor sandbox,pk_prd_xxxfor live). The publishable key is safe to use in client-side code. - Under API keys, click New API key + to create a merchant API key (
snd_xxxfor sandbox,prd_xxxfor live).
Never ship your merchant API key
The merchant API key belongs on your server only. Never expose it in client-side code — a web page, a mobile app bundle, or anything else a shopper can read.
Can't find these credentials, or don't see the Peach Orchestration section? Contact support to request access.
Backend server
You need a server to create Payment Intents. Keep your secret key on the server only.
Wallet prerequisites
Mobile SDK V2 requires your own wallet credentials for app review, unlike the Web SDK, where you can use the Peach Payments certificates and IDs. Use the Apple Pay steps when targeting iOS, and the Google Pay and Samsung Pay steps when targeting Android.
Apple Pay
For app integrations you provide your own Apple Pay certificates, which requires Apple Developer Program membership. Peach Payments provides the certificate signing requests (CSRs) — contact support to request them.
- Register a merchant ID in the Apple Developer portal under Certificates, Identifiers & Profiles > Identifiers > Merchant IDs, using the format
merchant.com.yourcompany. Go to Merchant IDs. - Create a payment processing certificate against that merchant ID.
- In Xcode, go to Signing & Capabilities > + Capability > Apple Pay and tick your registered merchant IDs.
- Send Peach Payments your Apple Pay merchant ID and certificates so they can configure your account.
Apple's own references: Setting up your server and the Apple Pay implementation guide.
Google Pay
For app integrations you provide your own Google Pay ID for app review. The API merchantId is only enforced in production.
- Register in the Google Pay & Wallet Console and send Peach Payments the merchant ID Google issues.
- Complete the business profile — name, logo, and website — that is shown on the payment sheet.
- Submit for production access before going live. The test environment works without approval.
Google's own references: Web integration and Android integration.
Samsung Pay
For app integrations you provide your own Samsung Pay certificates for your app review process.
- Register at Samsung Pay Developers and create a service in the Samsung Pay portal.
- Choose the Online / In-App service type, which generates a service ID.
- Peach Payments provides a CSR so you can obtain the service certificate and register your callback and domain details — contact support to request it.
Samsung's own references: the Samsung Pay console and Getting started.
Install the SDK package with your package manager, then complete the small amount of native setup each platform needs.
Install the package
npm install @peach-payments/react-native@1.1.0Or with Yarn:
yarn add @peach-payments/react-native@1.1.0iOS
Install the pods:
cd ios && pod install && cd ..Android
No additional setup is needed. Ensure minSdkVersion is 21 or later in android/build.gradle.
Configure the SDK by wrapping your app with HyperProvider, passing your publishable key and the API host it should talk to.
Wrap your app with the provider
import { HyperProvider } from '@peach-payments/react-native';

function App() {
  return (
    <HyperProvider
      publishableKey="pk_test_your_publishable_key"
      customBackendUrl="https://app.sandbox-next.peachpayments.com/api"
    >
      <NavigationContainer>
        <AppNavigator />
      </NavigationContainer>
    </HyperProvider>
  );
}

export default App;
A checkout screen creates a Payment Intent on your server, initialises a payment session with the returned client secret, and then presents the payment sheet.
Checkout screen
import React, { useState } from 'react';
import { View, Button, Alert, ActivityIndicator } from 'react-native';
import { useHyper } from '@peach-payments/react-native';

function CheckoutScreen({ amount, currency }) {
  const { initPaymentSession, presentPaymentSheet } = useHyper();
  const [loading, setLoading] = useState(false);

  const handlePayment = async () => {
    setLoading(true);

    try {
      // 1. Create payment intent on your server
      const response = await fetch(
        'https://your-server.com/create-payment-intent',
        {
          method: 'POST',
          headers: { 'Content-Type': 'application/json' },
          body: JSON.stringify({ amount, currency }),
        },
      );
      const { clientSecret } = await response.json();

      // 2. Initialise payment session
      const session = await initPaymentSession({
        clientSecret,
        merchantDisplayName: 'Your Store',
      });

      // 3. Present payment sheet with session
      const result = await presentPaymentSheet(session);

      if (result?.status === 'cancelled') {
        // User dismissed - not an error
      } else if (result?.message) {
        Alert.alert('Error', result.message);
      } else {
        Alert.alert('Success', 'Payment completed!');
      }
    } catch (error) {
      Alert.alert('Error', error.message);
    } finally {
      setLoading(false);
    }
  };

  return (
    <View style={{ flex: 1, justifyContent: 'center', padding: 20 }}>
      {loading ? (
        <ActivityIndicator size="large" />
      ) : (
        <Button title="Pay Now" onPress={handlePayment} />
      )}
    </View>
  );
}
Payment methods are configured when you initialise the payment session, not when you present the sheet.
Configure payment methods
Configure payment methods in initPaymentSession:
const session = await initPaymentSession({
  clientSecret,
  merchantDisplayName: 'Your Store',
  configuration: {
    // Payment method ordering and config
    googlePay: {
      merchantCountryCode: 'ZA',
      currencyCode: 'ZAR',
    },
    allowsDelayedPaymentMethods: true,
  },
});
Then present:
const result = await presentPaymentSheet(session);Handle deep links in your app for redirect-based payments.
Saved cards are enabled by passing customer details in the session configuration, after which you can read the customer's saved payment methods and confirm a payment with one of them.
Enable saved cards
Enable saved cards with customer configuration:
const session = await initPaymentSession({
  clientSecret,
  merchantDisplayName: 'Your Store',
  configuration: {
    customer: {
      id: 'cus_xxx',
      ephemeralKeySecret: 'ek_xxx',
    },
    allowsDelayedPaymentMethods: true,
  },
});
Read saved payment methods
Get saved payment methods:
const savedMethods = await getCustomerSavedPaymentMethods(session);
const defaultMethod = await getCustomerDefaultSavedPaymentMethodData(session);
const lastUsedMethod = await getCustomerLastUsedPaymentMethodData(session);
const allMethods = await getCustomerSavedPaymentMethodData(session);
Confirm with a saved method
const result = await confirmWithCustomerDefaultPaymentMethod({
  sessionParams: session,
  cvc: '123', // optional
});
presentPaymentSheet returns a result object rather than throwing for payment failures, so check the result as well as catching exceptions.
Dismissal is not a failure
A result with a type_ or status of cancelled means the shopper dismissed
the sheet. Return quietly instead of showing an error.
Handling the result
presentPaymentSheet returns { type_, code, message, status }:
const handlePayment = async () => {
  try {
    const session = await initPaymentSession({
      clientSecret,
      merchantDisplayName: 'Your Store',
    });

    // presentPaymentSheet returns { type_, code, message, status }
    const result = await presentPaymentSheet(session);

    if (result?.type_ === 'cancelled') {
      // User dismissed - not an error
      return;
    }

    if (result?.status === 'failed' || result?.message) {
      handleError(result);
    } else {
      onPaymentSuccess();
    }
  } catch (e) {
    handleError(e);
  }
};

const handleError = (error) => {
  const message = error.message || 'Payment failed.';

  Alert.alert('Payment Error', message, [
    { text: 'OK' },
    { text: 'Retry', onPress: handlePayment },
  ]);
};
The payment sheet's appearance is set through the appearance block of the session configuration.
Appearance configuration
const session = await initPaymentSession({
  clientSecret,
  merchantDisplayName: 'Your Store',
  configuration: {
    appearance: {
      // Theme: "Automatic", "AlwaysLight", "AlwaysDark", "FlatMinimal", "Minimal"
      themes: 'Automatic',
      colors: {
        primary: '#0066FF',
        background: '#FFFFFF',
        componentBackground: '#F5F5F5',
        componentBorder: '#E0E0E0',
        text: '#000000',
        secondaryText: '#666666',
        placeholderText: '#999999',
        icon: '#666666',
        error: '#FF0000',
      },
      shapes: {
        borderRadius: 12,
        borderWidth: 1,
      },
      primaryButton: {
        colors: {
          background: '#0066FF',
          text: '#FFFFFF',
        },
        shapes: {
          borderRadius: 8,
        },
      },
    },
  },
});
Use the test cards below in sandbox, switch keys with React Native's __DEV__ flag, and mock the SDK in Jest.
Test cards
| Card number | Result |
|---|---|
| 4242424242424242 | Success |
| 4000002500003155 | 3DS Required |
| 4000000000000002 | Declined |
Switching environments
Use __DEV__ for environment switching:
const publishableKey = __DEV__ ? 'pk_test_xxx' : 'pk_live_xxx';Jest testing
import { renderHook, act } from '@testing-library/react-hooks';
import { useHyper } from '@peach-payments/react-native';

jest.mock('@peach-payments/react-native');

describe('Checkout', () => {
  it('initializes payment session', async () => {
    const { result } = renderHook(() => useHyper());

    await act(async () => {
      const session = await result.current.initPaymentSession({
        clientSecret: 'pi_xxx_secret_xxx',
        merchantDisplayName: 'Test Store',
      });
      expect(session).toBeDefined();
    });
  });
});
Most React Native integration problems come down to a missing native build step or an unconfigured URL scheme.
Module not found
Reinstall the dependencies and the pods:
npm install && cd ios && pod install"requireNativeComponent" error
Rebuild the app. Refreshing the JavaScript bundle is not enough.
Payment sheet not appearing
Ensure initPaymentSheet completes before presentPaymentSheet.
Deep links not working
Configure URL schemes in both platforms:
- iOS:
CFBundleURLSchemesinInfo.plist. - Android: an intent filter in
AndroidManifest.xml.
Debug mode
Enable debug logging in development mode. React Native's __DEV__ flag is used automatically.
Getting help
Contact support for help.